Microsoft Entra SSO
iceDQ can be integrated with Microsoft Entra (formerly Azure AD) as an Identity Provider (IdP) using the OpenID Connect (OIDC) protocol. This allows users to log in to iceDQ using their Microsoft Entra credentials and enable single sign-on.
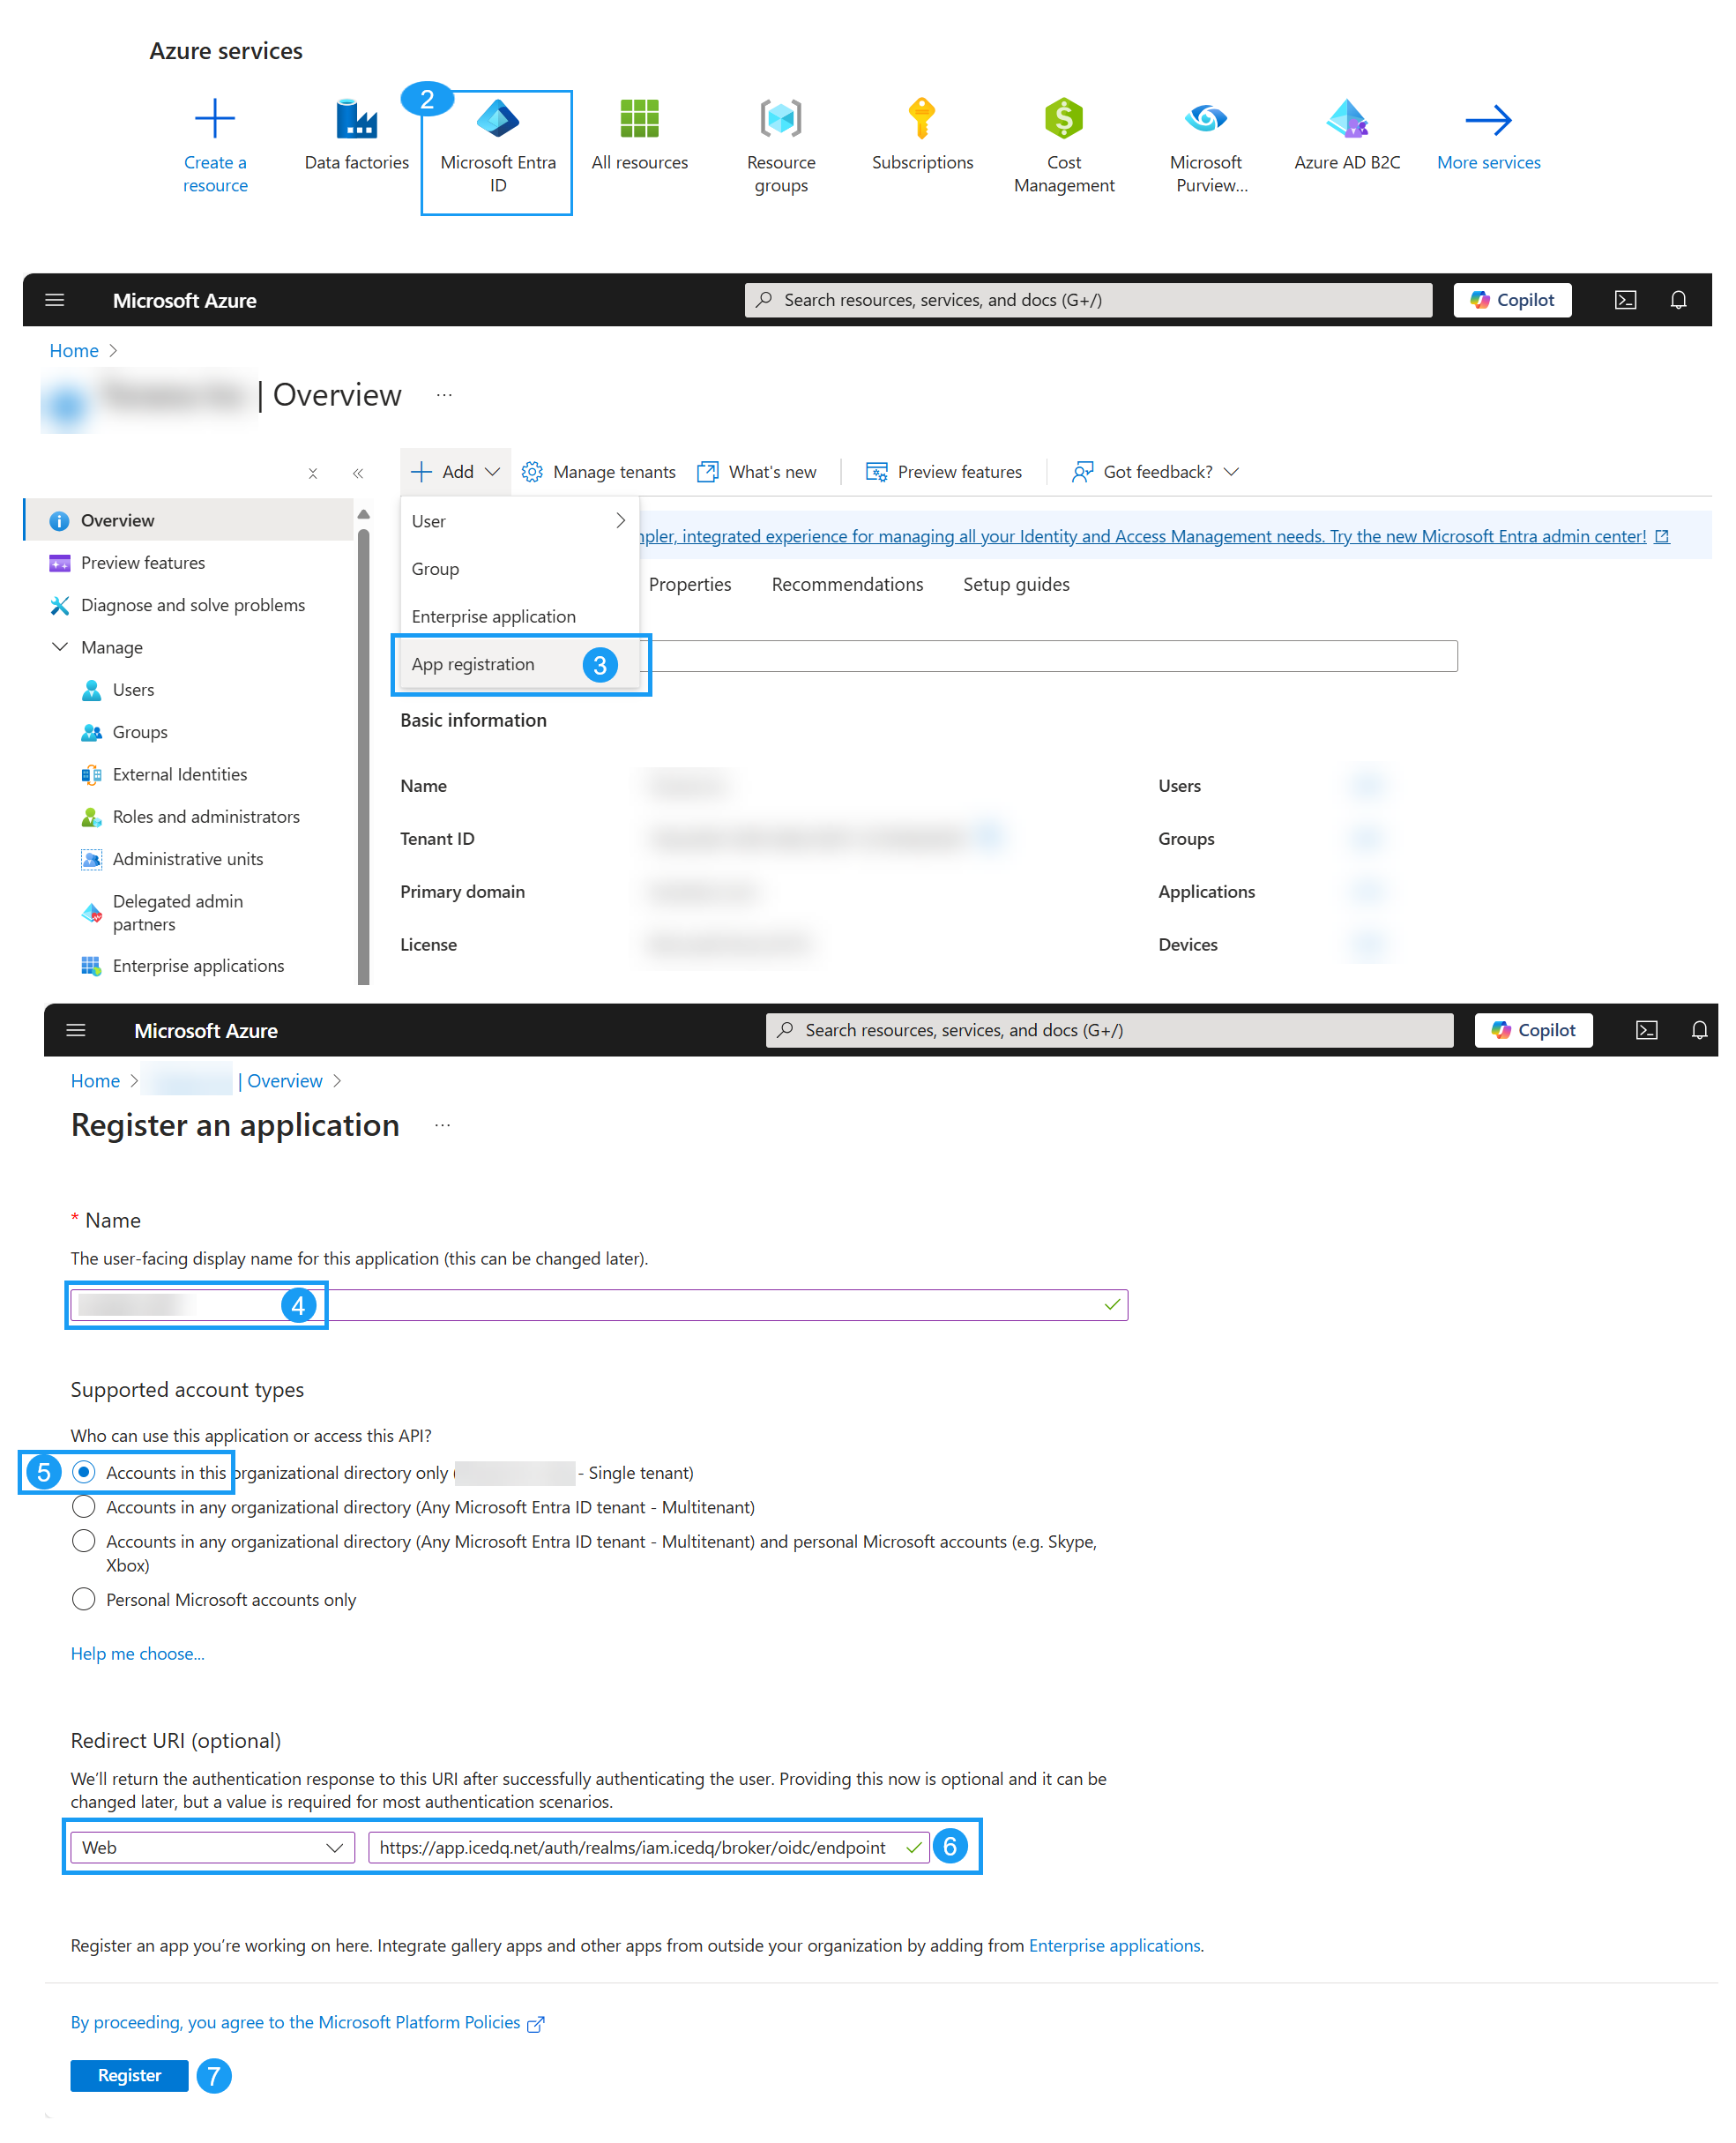
1. Register an App in Microsoft Entra
- Log in to the Microsoft Azure Portal with admin credentials.
- Navigate to Microsoft Entra ID.
- Click + Add > App registration.
- Provide an Application Name (e.g., "Azure SSO for iceDQ").
- Set Supported Account Types to Single Tenant.
- Configure Redirect URI:
- Set Type to Web.
- Set Value to:
https://<base-url>/auth/realms/iam.icedq/broker/<idp-alias>/endpoint. Replace<idp-alias>with a unique identifier.
- Click Register.
Important
Please remember the idp-alias, as you will need to use the same name when creating the identity provider entry in iceDQ.
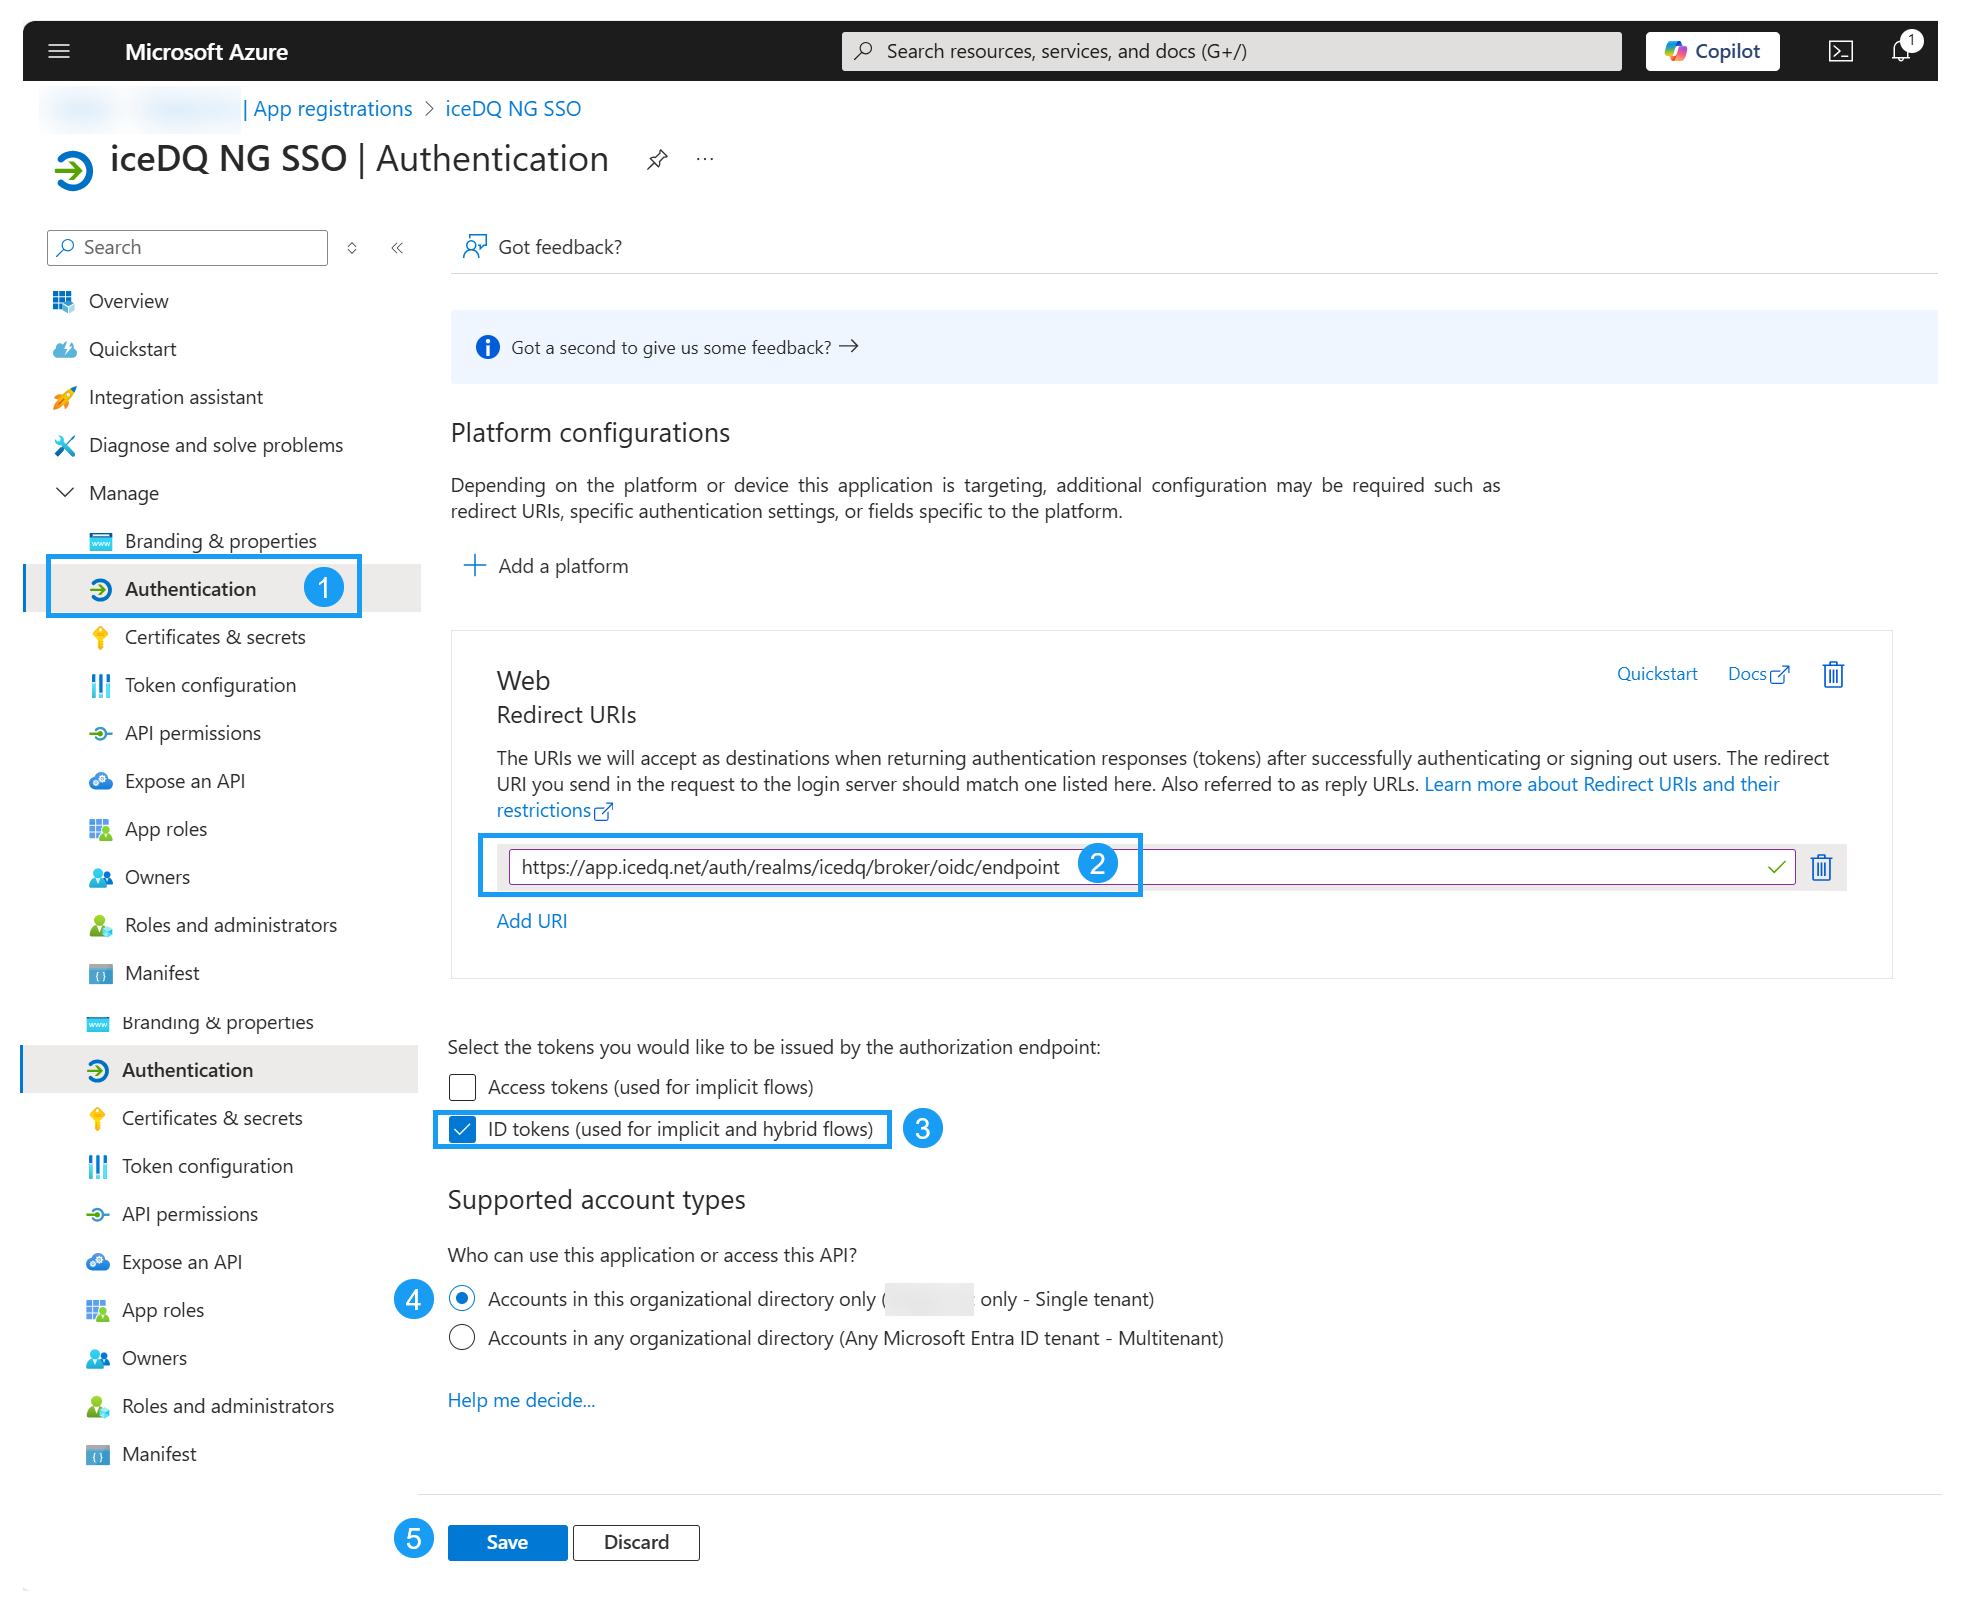
2. Configure App Authentication
- Navigate to Authentication.
- Add the URI as Web and enter Redirect URI.
- Check ID Tokens.
- Select Single Tenant as the Supported Account Type.
- Click Save.
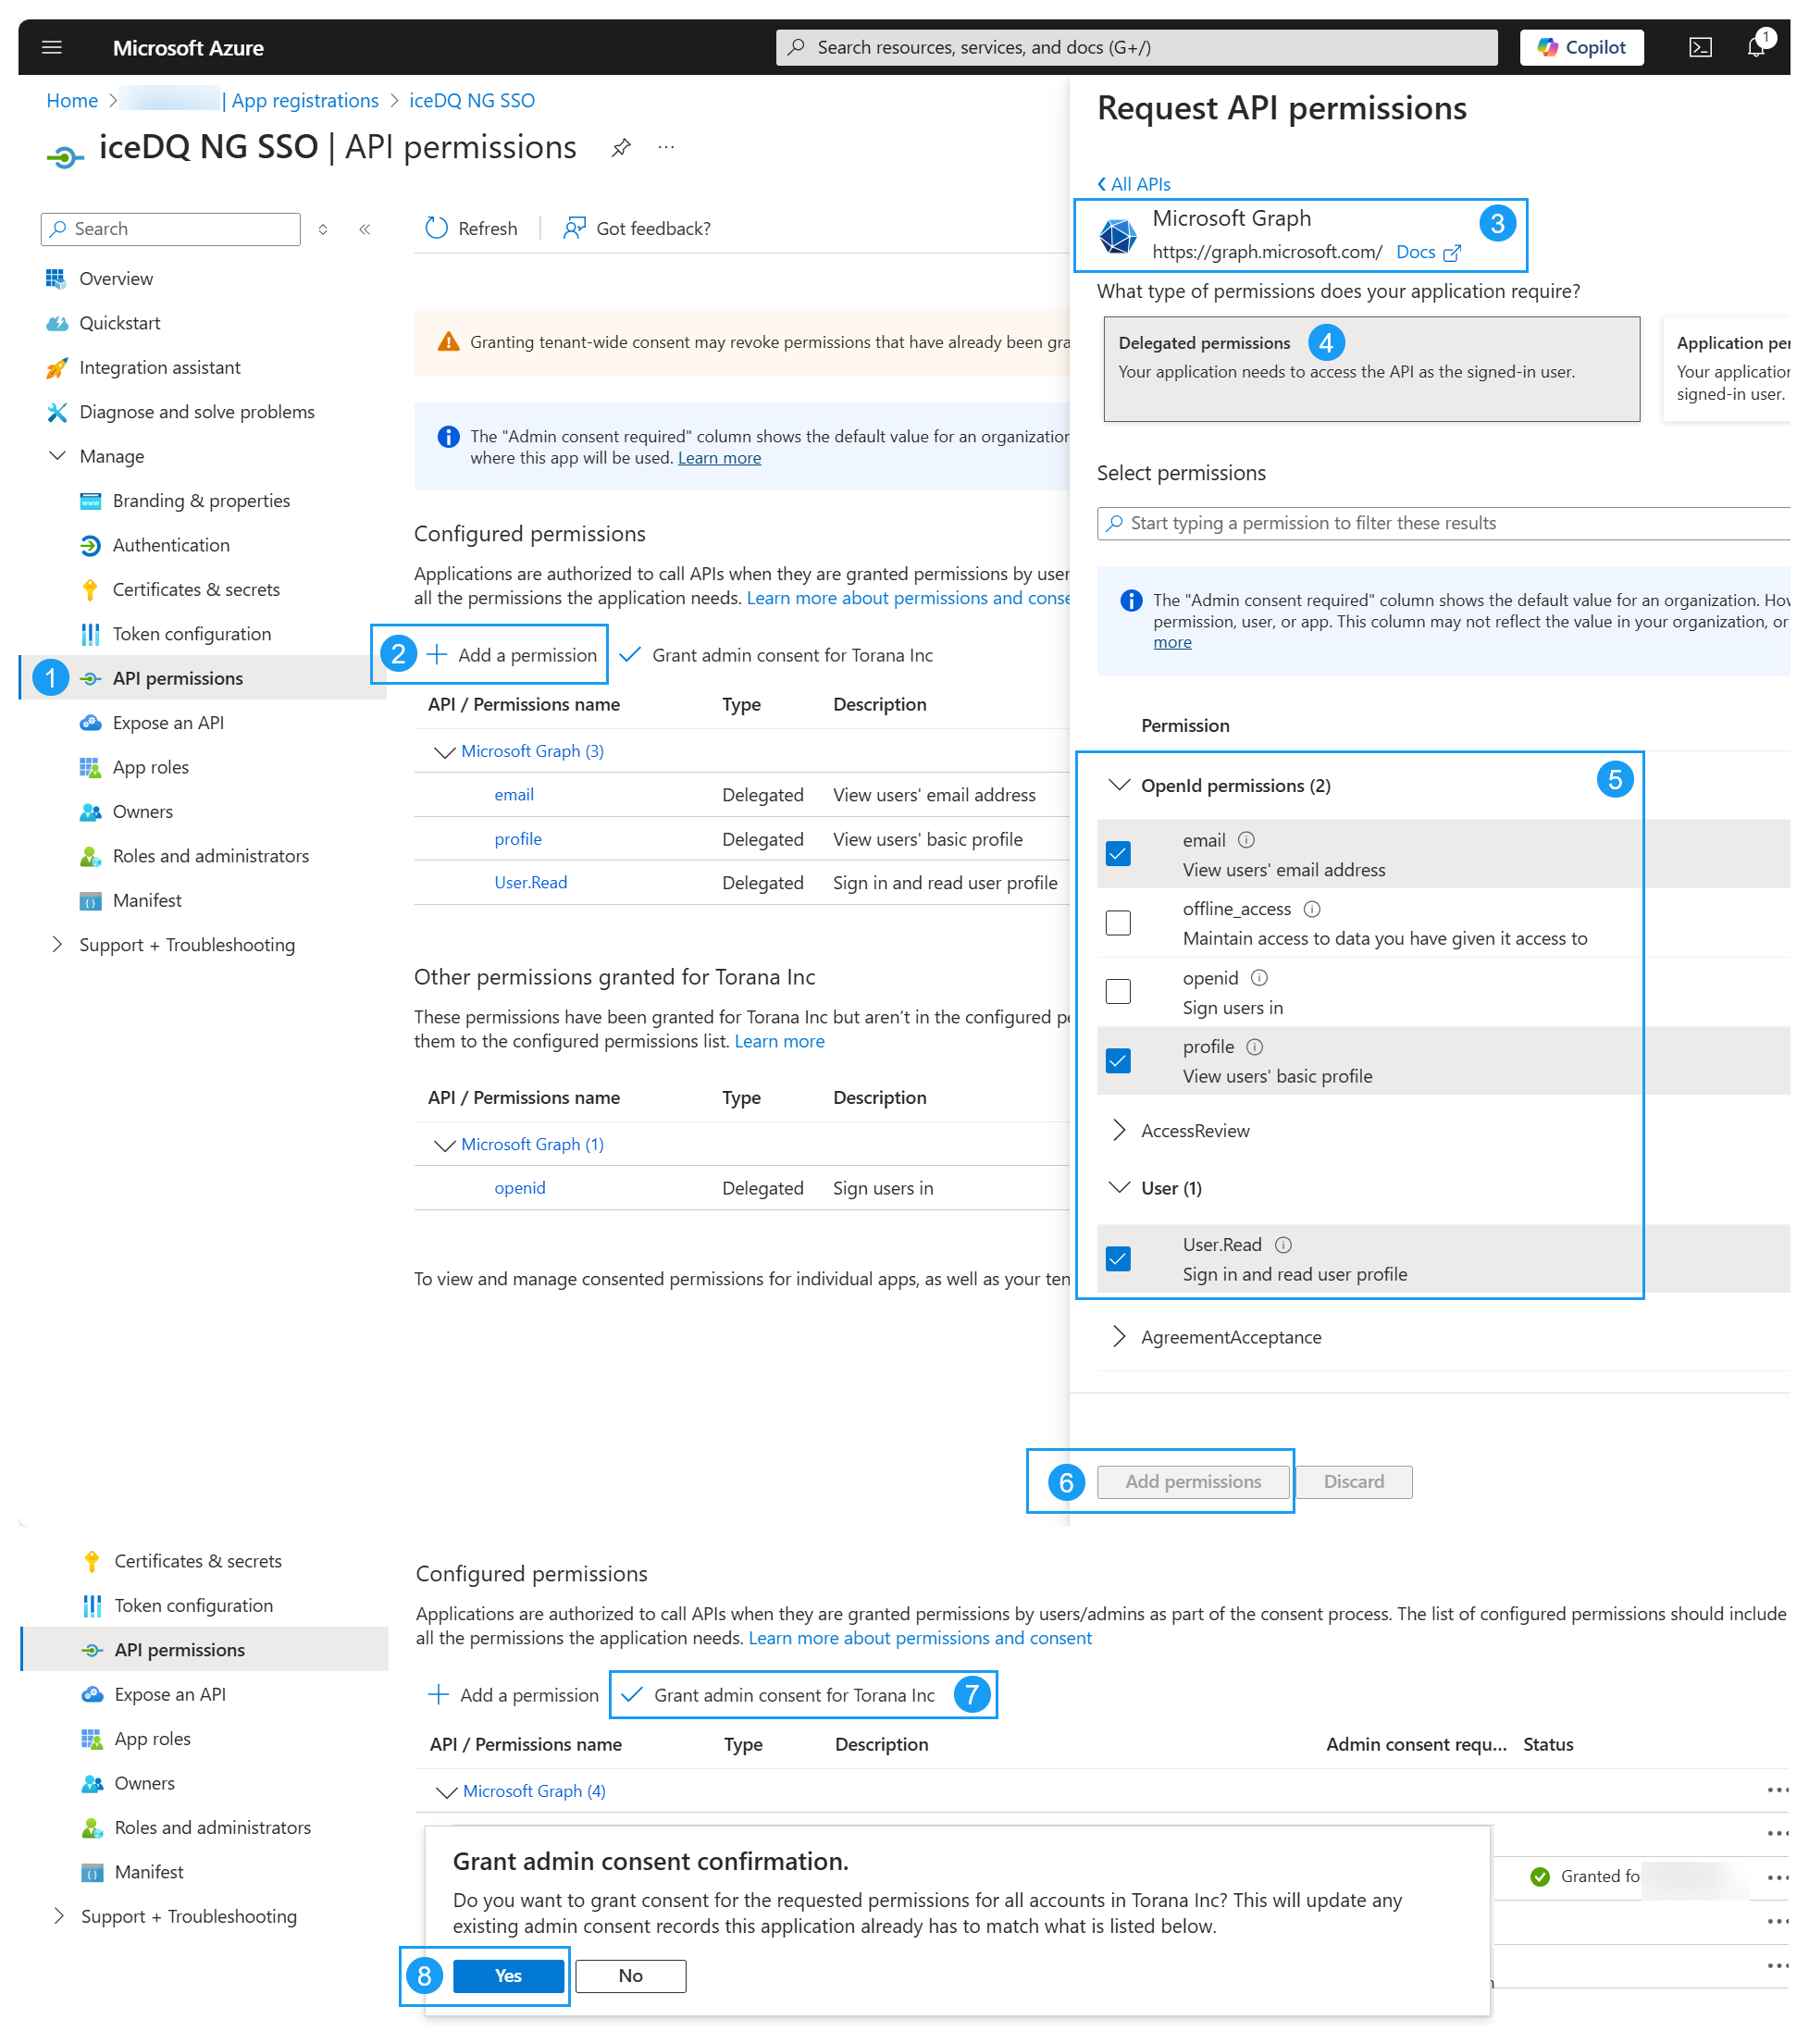
3. Configure API Permissions
- Go to API Permissions.
- Click Add a permission.
- Select Microsoft Graph.
- Choose Delegated Permissions.
- Select the following permissions:
- OpenID Permissions:
email,profile - User:
User.Read
- OpenID Permissions:
- Click Add Permissions.
- Click Grant admin consent for your organization.
- Click Yes.
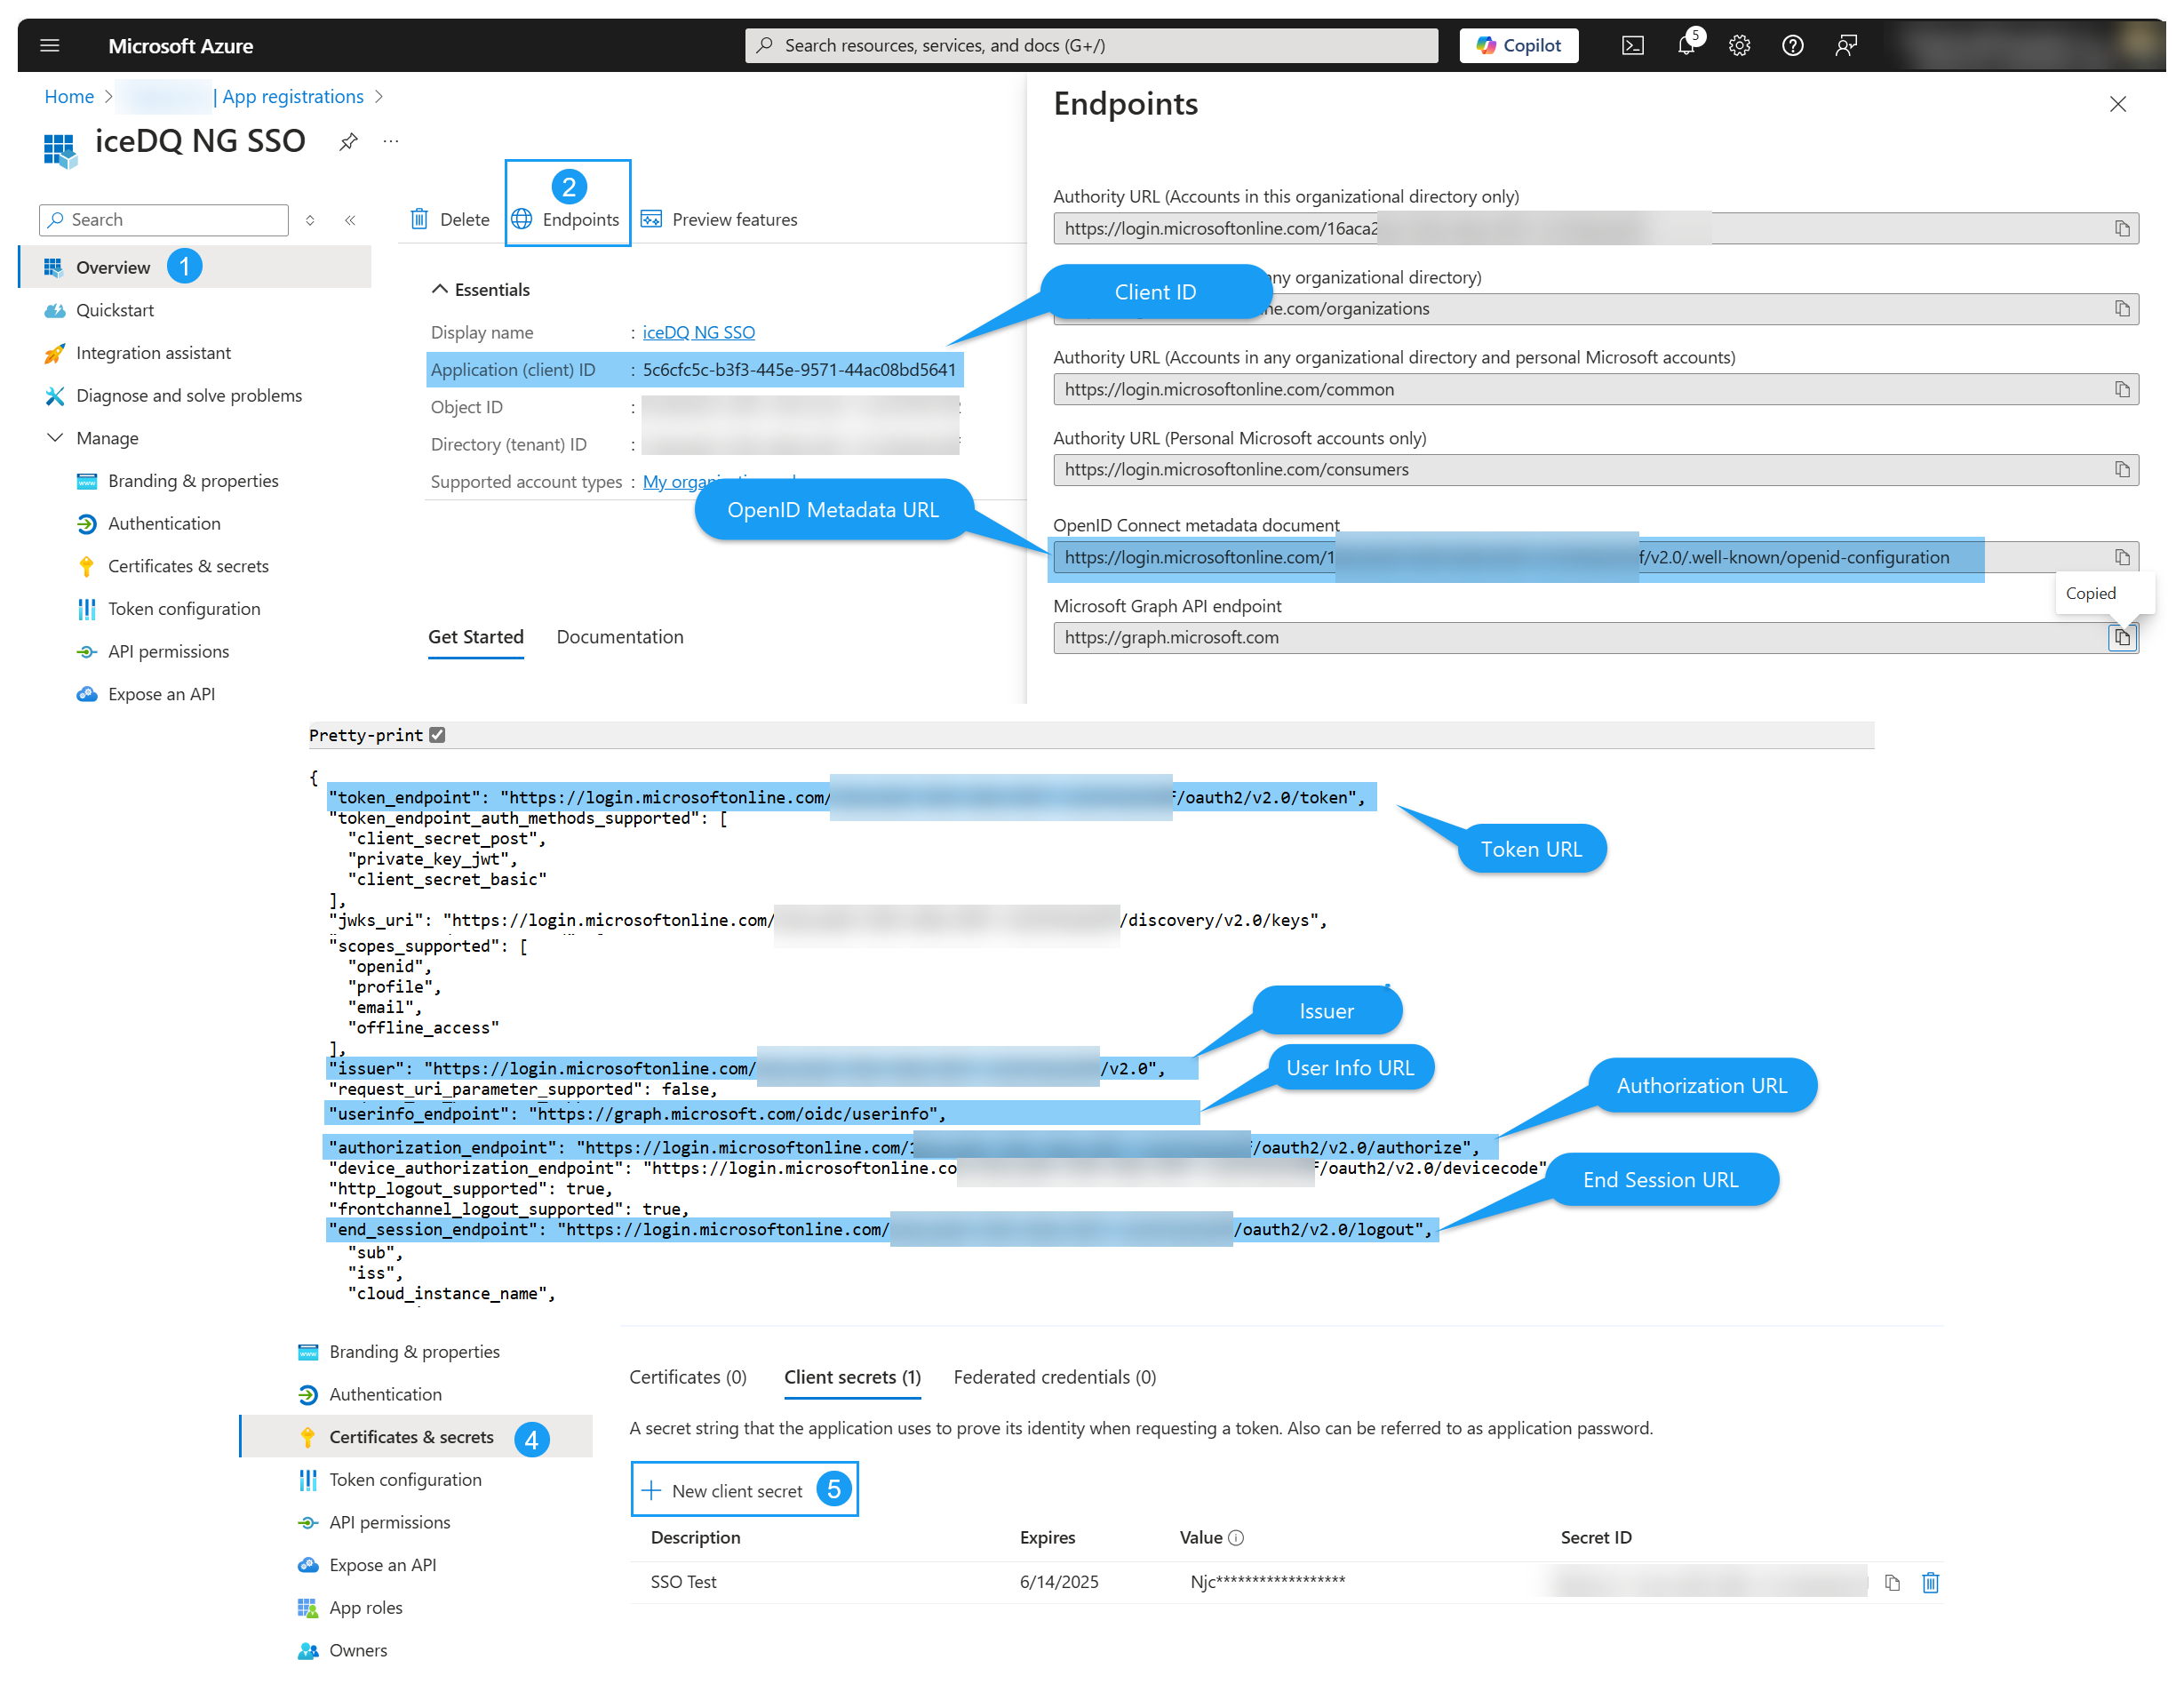
4. Retrieve Required Parameters
- Navigate to the Overview section of the registered app.
- Click Endpoints and note down the following:
- Client ID
- OpenID Connect metadata document URL
- Past OpenID metadata URL in a browser and note down the following:
- Token URL
- Issuer
- User Info URL
- Authorization URL
- End Session URL
- Navigate to Certificates & Secrets.
- Click New Client Secret, create a secret, and note it down.
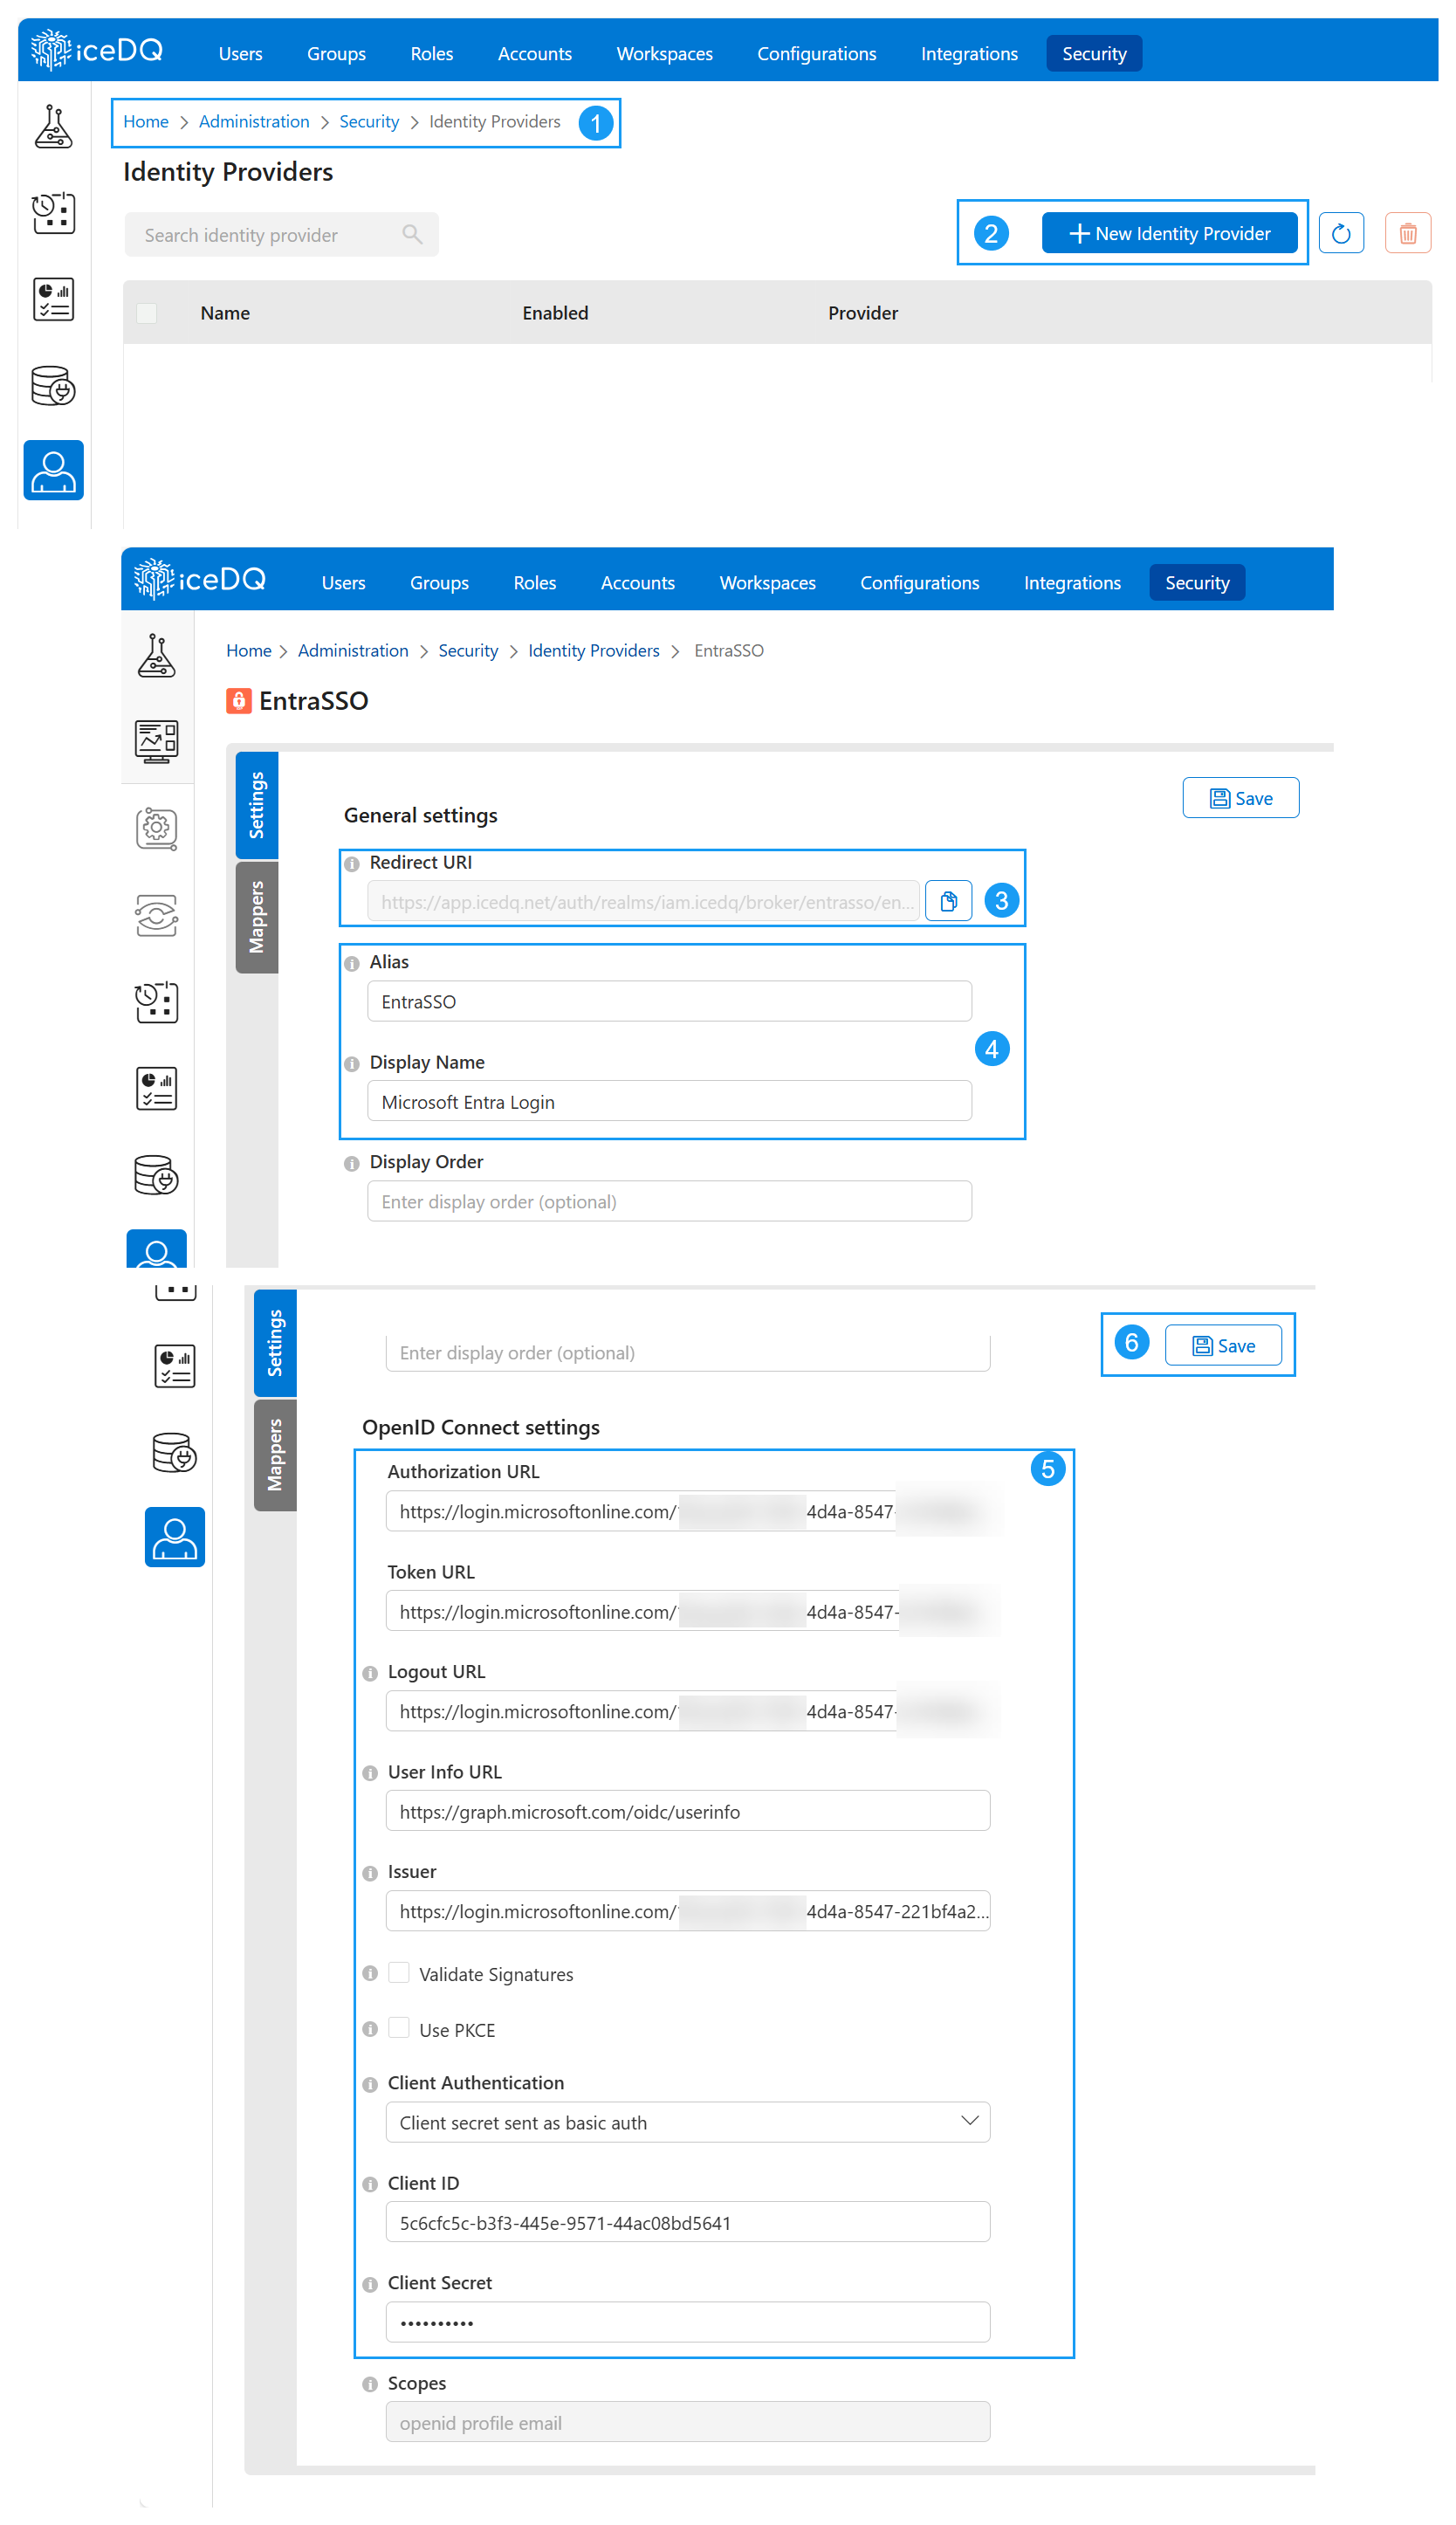
5. Configure Microsoft Entra as IDP
- Log in to iceDQ as an admin. Navigate to Administration > Security > Single Sign-On.
- Click New Identity Provider.
- Ensure the Redirect URI matches the one in Microsoft Entra.
- Enter Alias & Name:
- Alias: Same
<idp-alias>used during app registration. - Display Name: Friendly name for users.
- Alias: Same
- Enter OpenID Settings
- Uncheck Use Discovery Endpoint
- Authorization URL (from Retrieve Required Parameters Step).
- Token URL.
- Logout URL.
- User Info URL.
- Issuer.
- Client ID.
- Client Secret.
- Click Save.
6. Login using Microsoft Entra
- Open iceDQ in a browser.
- Click Sign In with 'IDP'.
- Enter Microsoft Entra credentials.
- After authentication, access iceDQ.
Video Guide
This video shows how to login using Microsoft Entra.
Optional: Assign Users or Groups
If you would like to restrict the SSO to specific number of users or groups then follow below steps in Microsoft Entra.
- Go to Enterprise Applications. >> Search and select the registered app.
- Under Manage, click Properties.
- Set Assignment Required to Yes.
- Click Save.
- Navigate to Users and Groups under Manage.
- Click + Add user/group. >> Select a user or group, then click Assign.
