Snowflake External OAuth Authentication - Entra ID (Azure AD)
Overview
Snowflake supports OAuth 2.0 authentication with Microsoft Entra ID (formerly Azure AD) as the identity provider (IdP). This allows users to sign in to Snowflake using their corporate Entra ID credentials. After login, an access token is issued and used by Snowflake to establish the session. This approach centralizes authentication and integrates with organizational security policies such as conditional access.
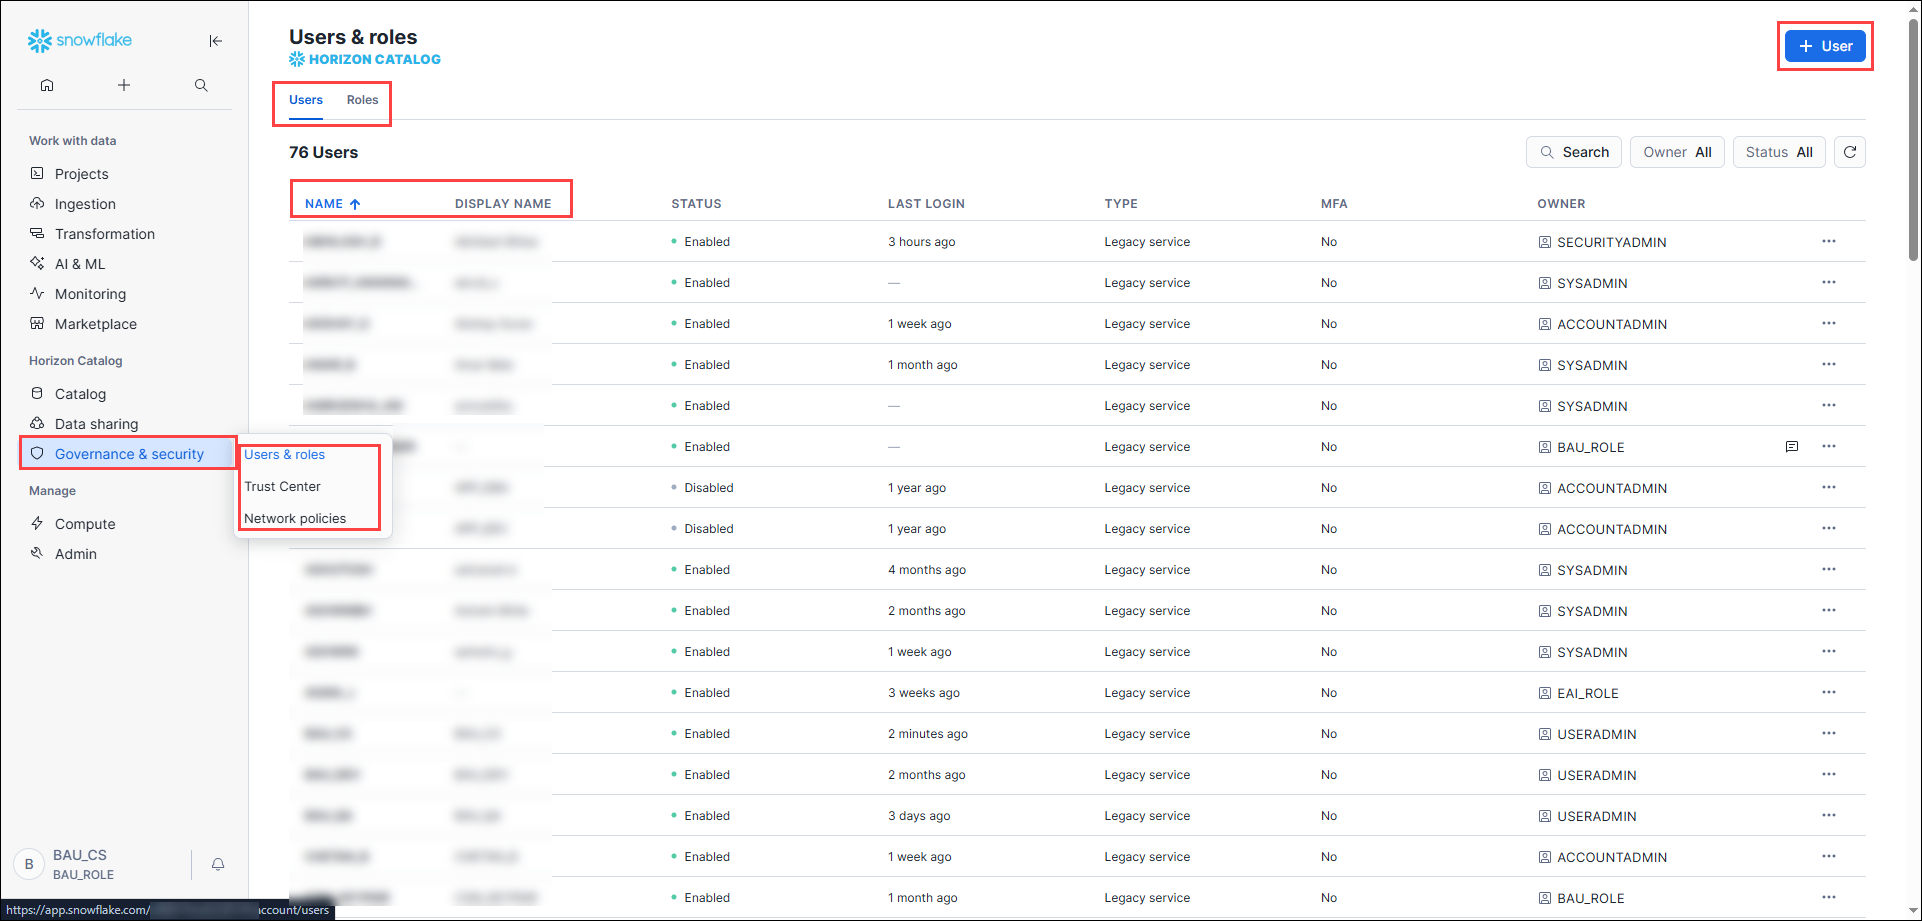
Part 1: Verify Roles & Users in Snowflake
First, verify the available Roles and Users in Snowflake, and create new ones if necessary:
- Log in to the Snowflake web portal using admin credentials.
- Navigate to the Account section.
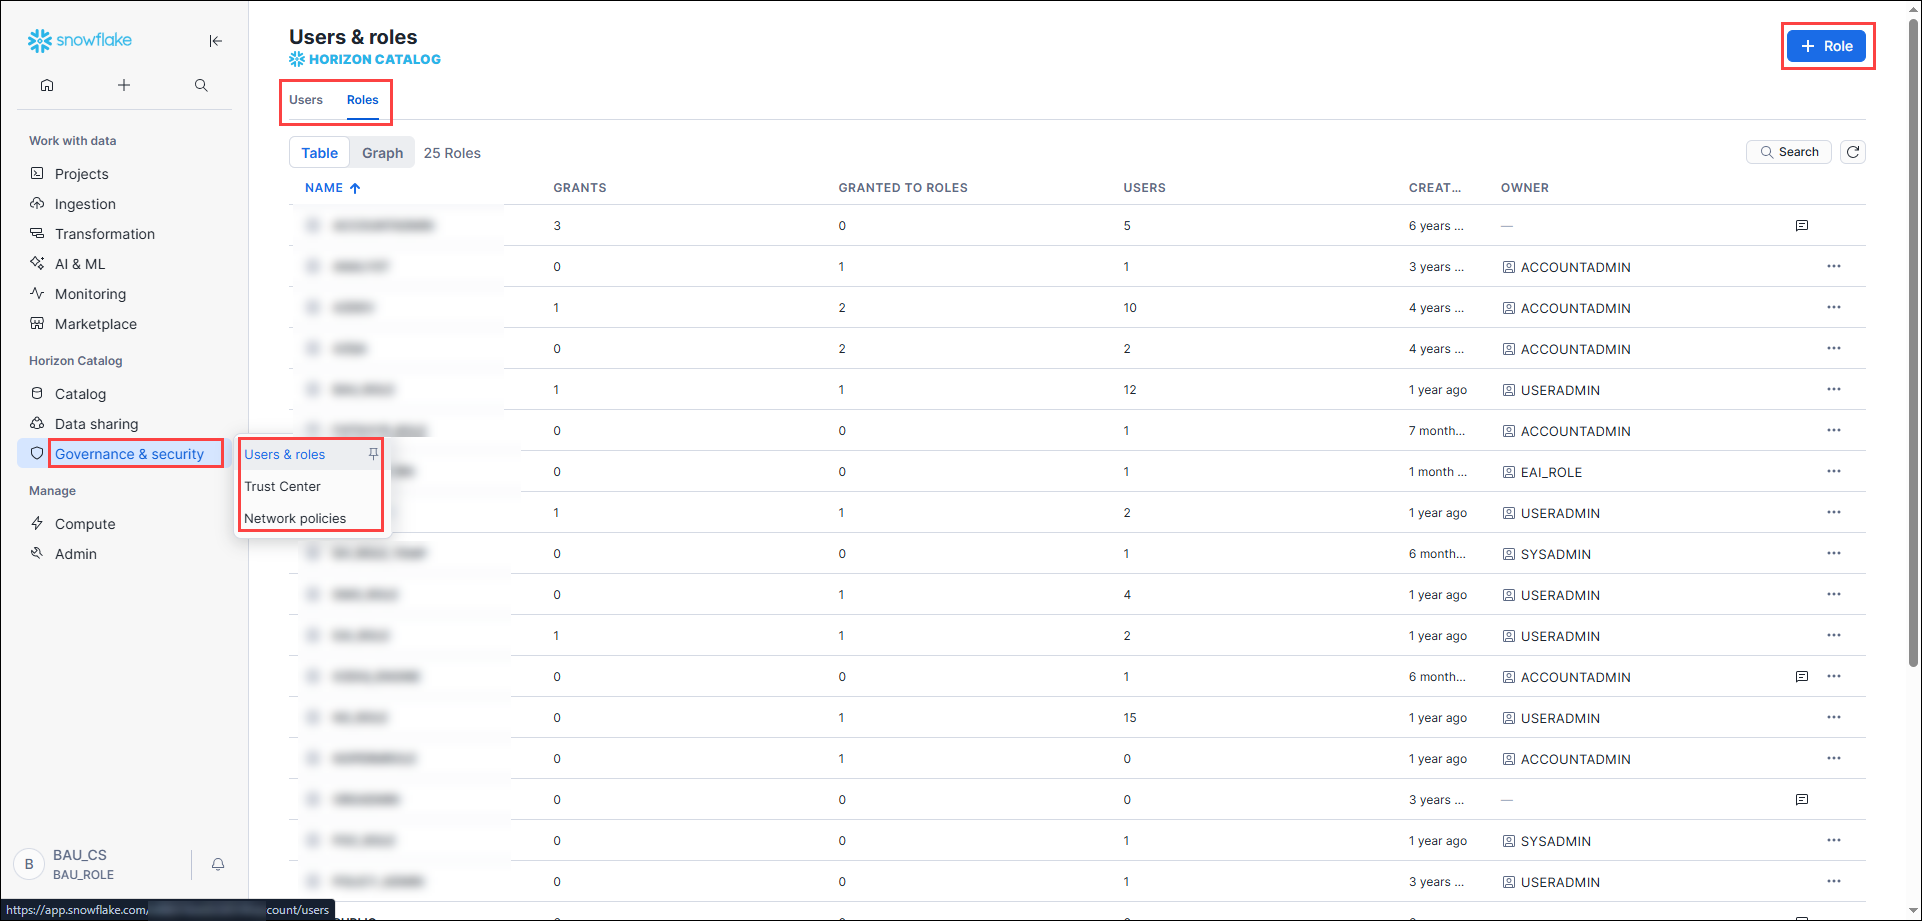
- Open the Roles tab.
- Create a new role if one does not already exist.
- Open the Users tab.
- Ensure that the user exists in Azure AD and has a valid password.
- Create or update a user in Snowflake:
- Set the Login Name to match the IdP (Azure AD) username.
- For example, if the IdP username is
[email protected], the user must enter the same value in the Login Name field in Snowflake. This will be validated against the username in the OAuth token. - Note: The Snowflake
Usernamecan differ from theLogin Name, but theLogin Namemust match the Entra ID username exactly for OAuth.
- Assign a default role to the user.
- Save the changes.
Part 2: Register an Entra ID Application
Configure OAuth client app in Microsoft Entra ID (formerly Azure AD) by following the steps given below. In the next steps, key OAuth components in Entra ID, including the Redirect URI, Application (client) ID, Application ID URI, and client secret will be configured.
-
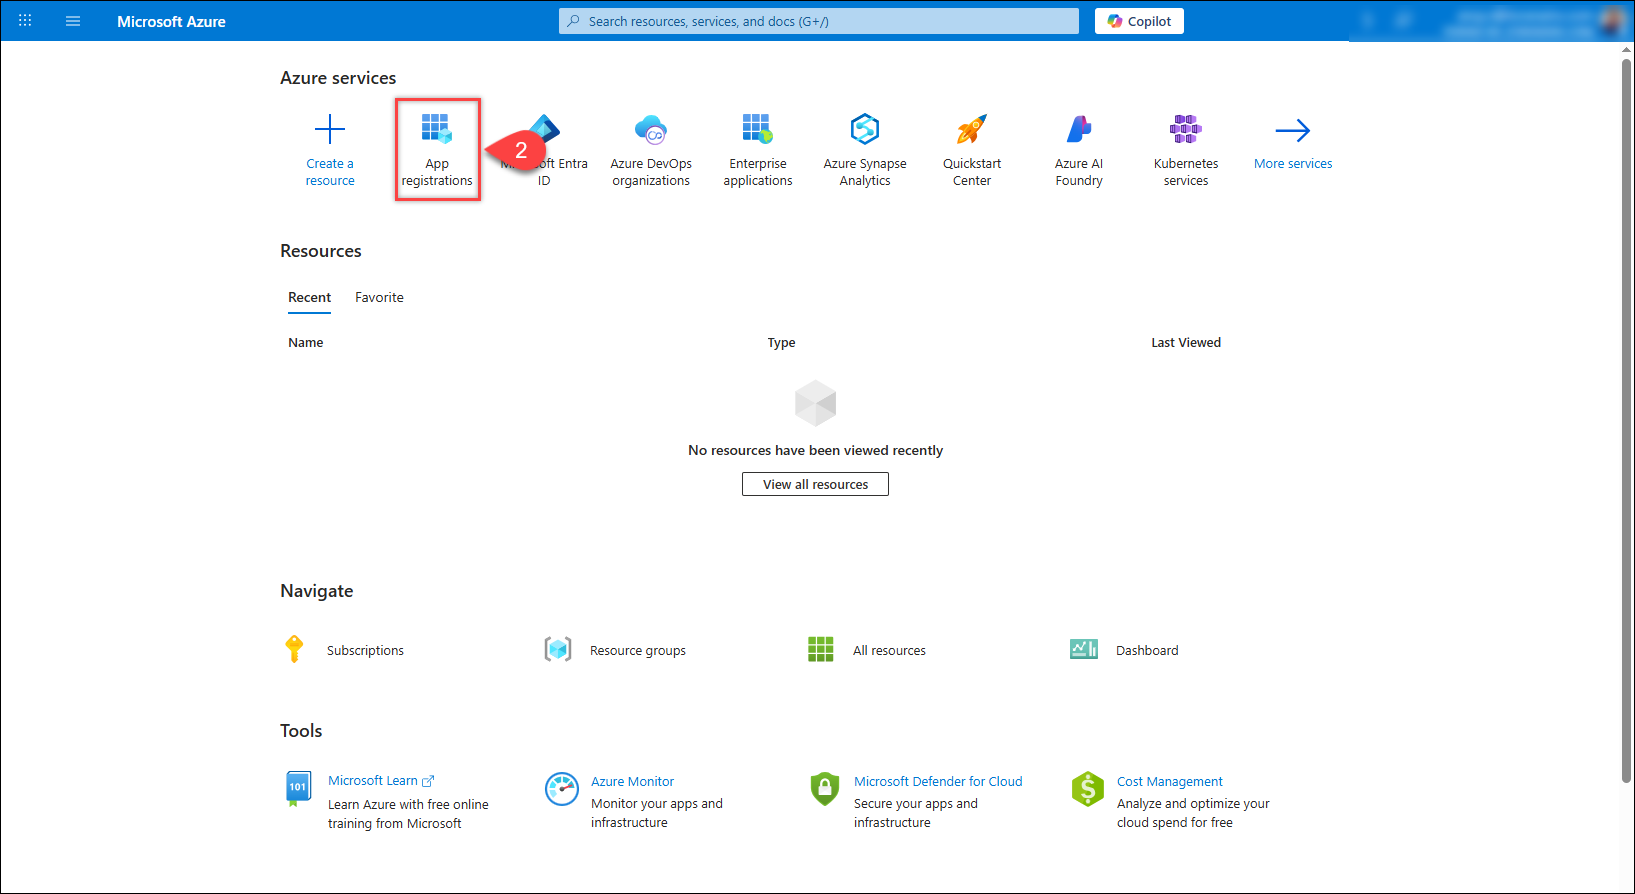
Navigate to the Azure Portal.
-
Click on App Registrations from the top menu.
-
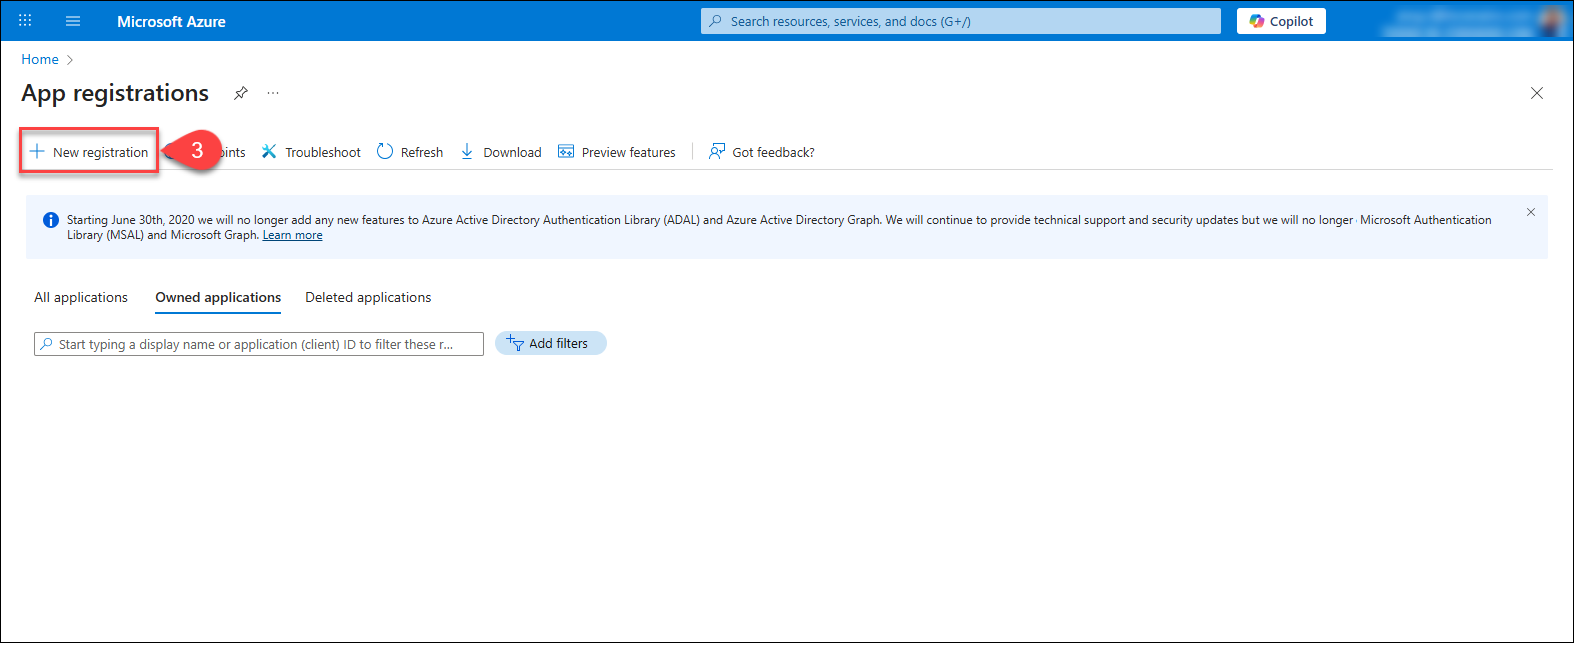
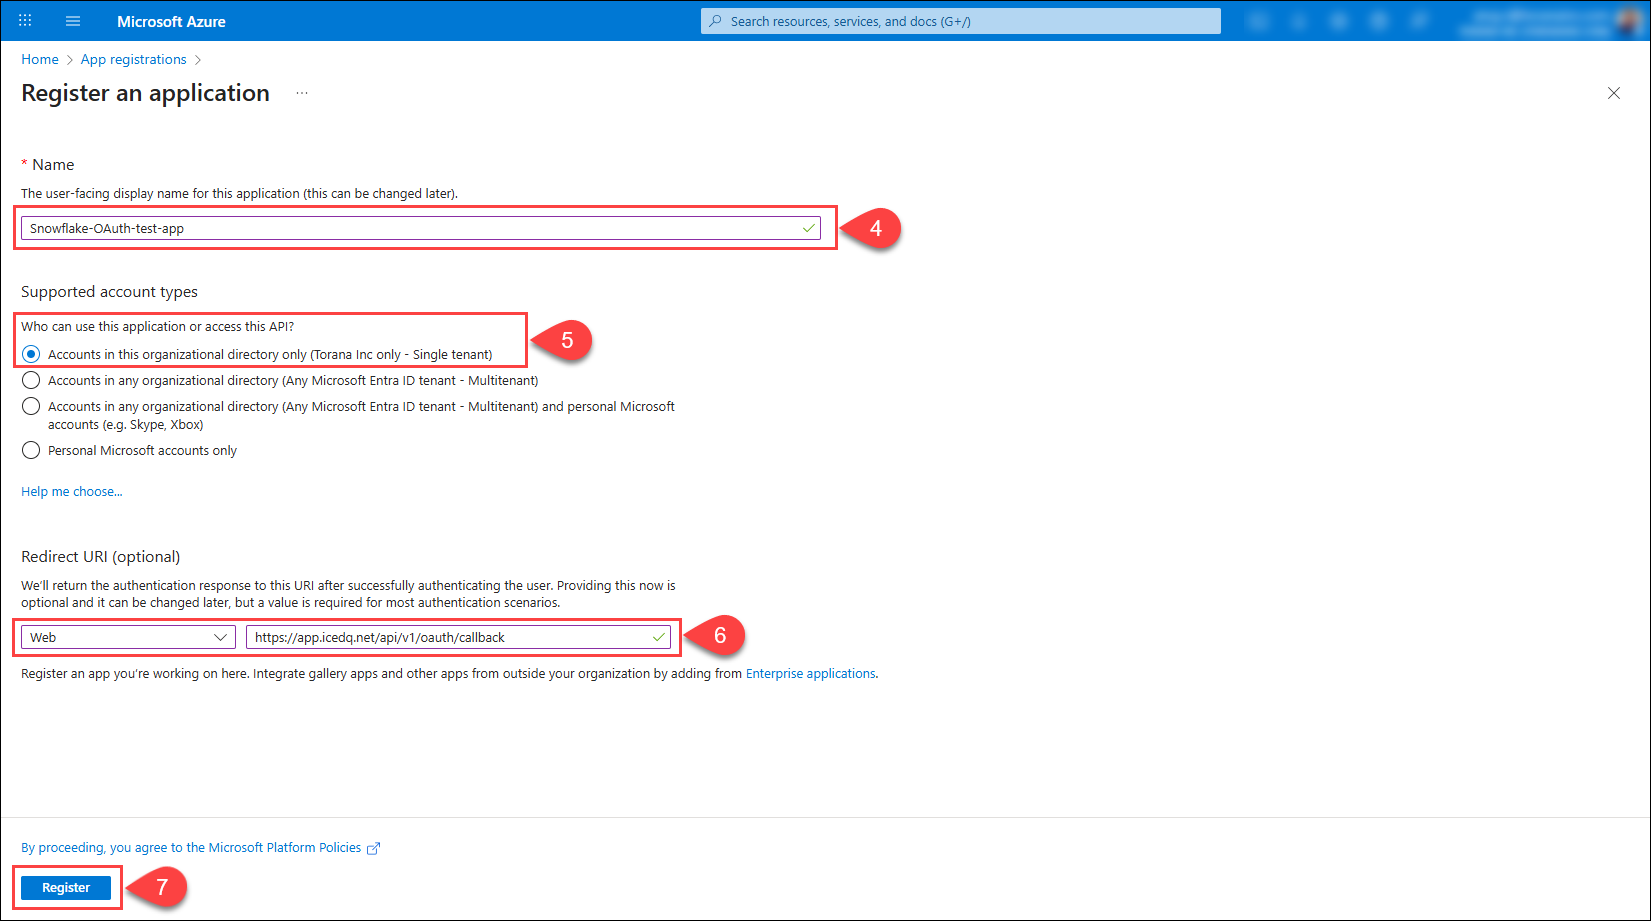
Click on New Registration.
-
Enter a unique name for the app. For example,
Snowflake-OAuth-app. -
Select Accounts in this organizational directory only (only - Single tenant).
-
In the Redirect URIs section, select Web and enter a suitable redirect URI that points to the icedq instance. For example,
https://app.icedq.net/api/v1/oauth/callback.importantThe Redirect URI must match the Callback URL in the Snowflake connection configuration in iceDQ.
In iceDQ, go to Connectors →New Connection → Snowflake → External OAuth Authentication and copy the Redirect URI from the Callback URL field. -
Click Register.
-
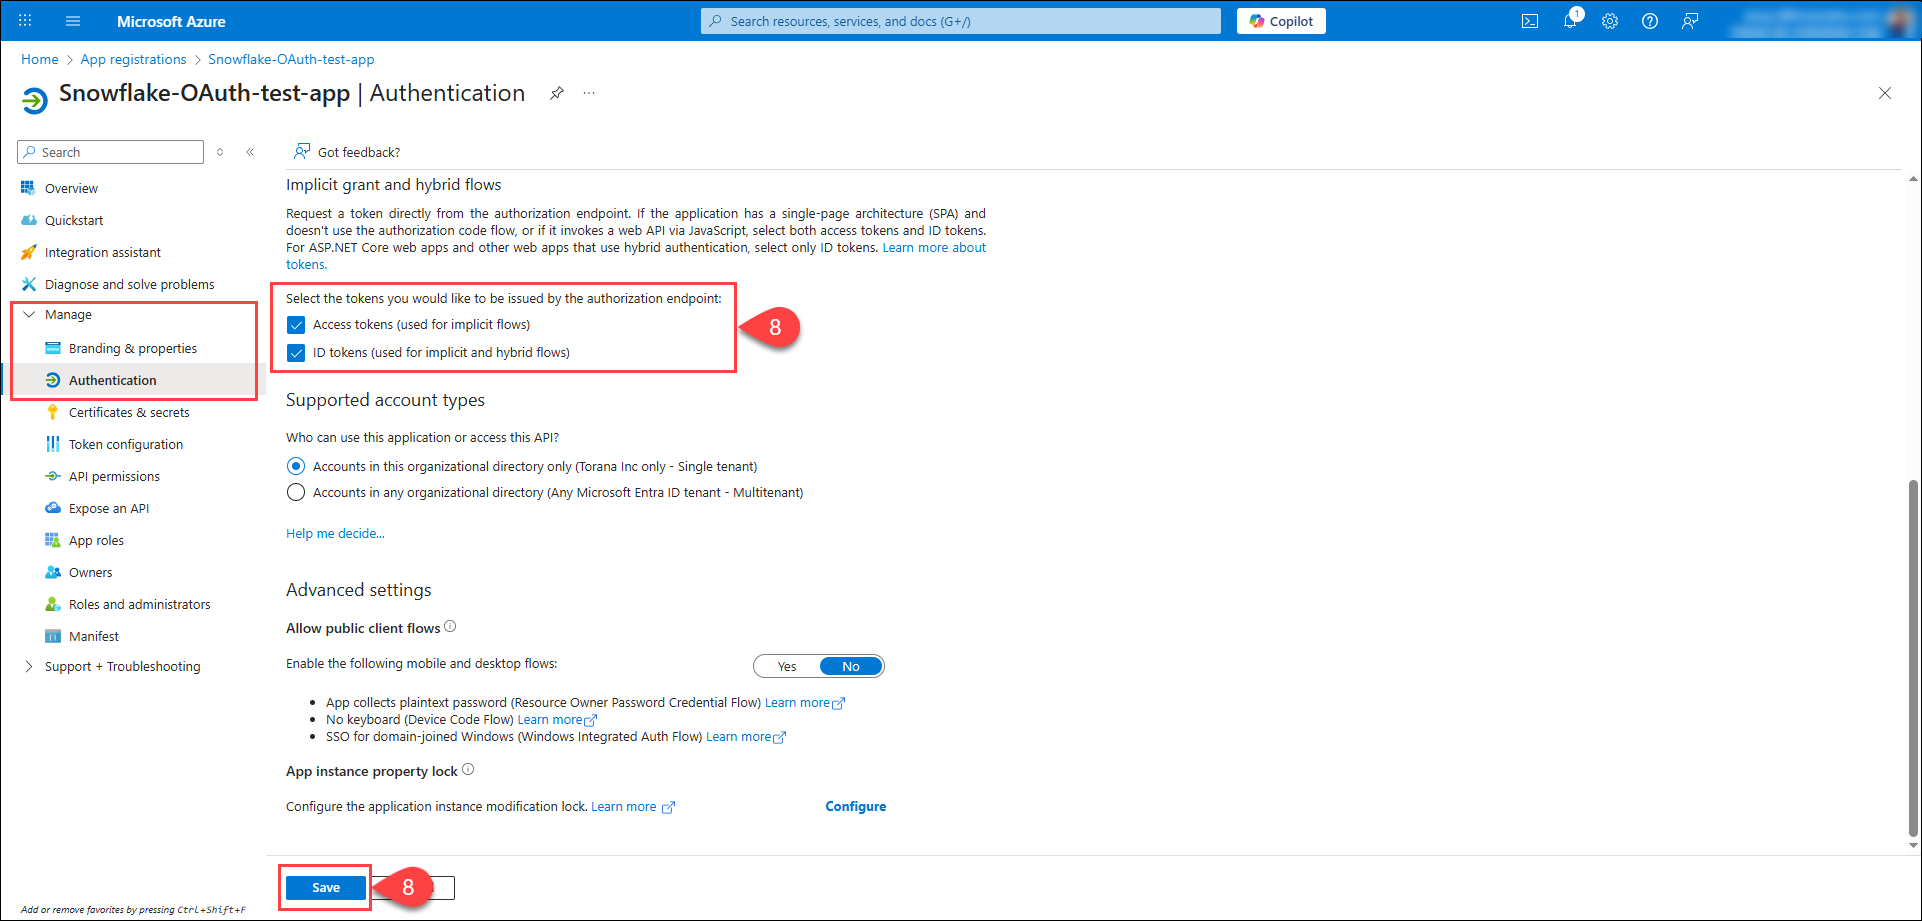
Navigate to the Authentication tab under the Manage section, and enable the Access Tokens and ID Tokens checkboxes, then click Save. This enables Authorization endpoint tokens.
-
Configure Application ID URI: An application ID URI needs to be configured, unique within the user's organization directory, which will be subsequently set in Snowflake as the Snowflake Application ID URI property. The Application ID URI must start with an
https://, and notapi://. To set the Application ID URI, navigate to the Expose an API tab under the Manage section, click Add, and enter the URI. Click Save.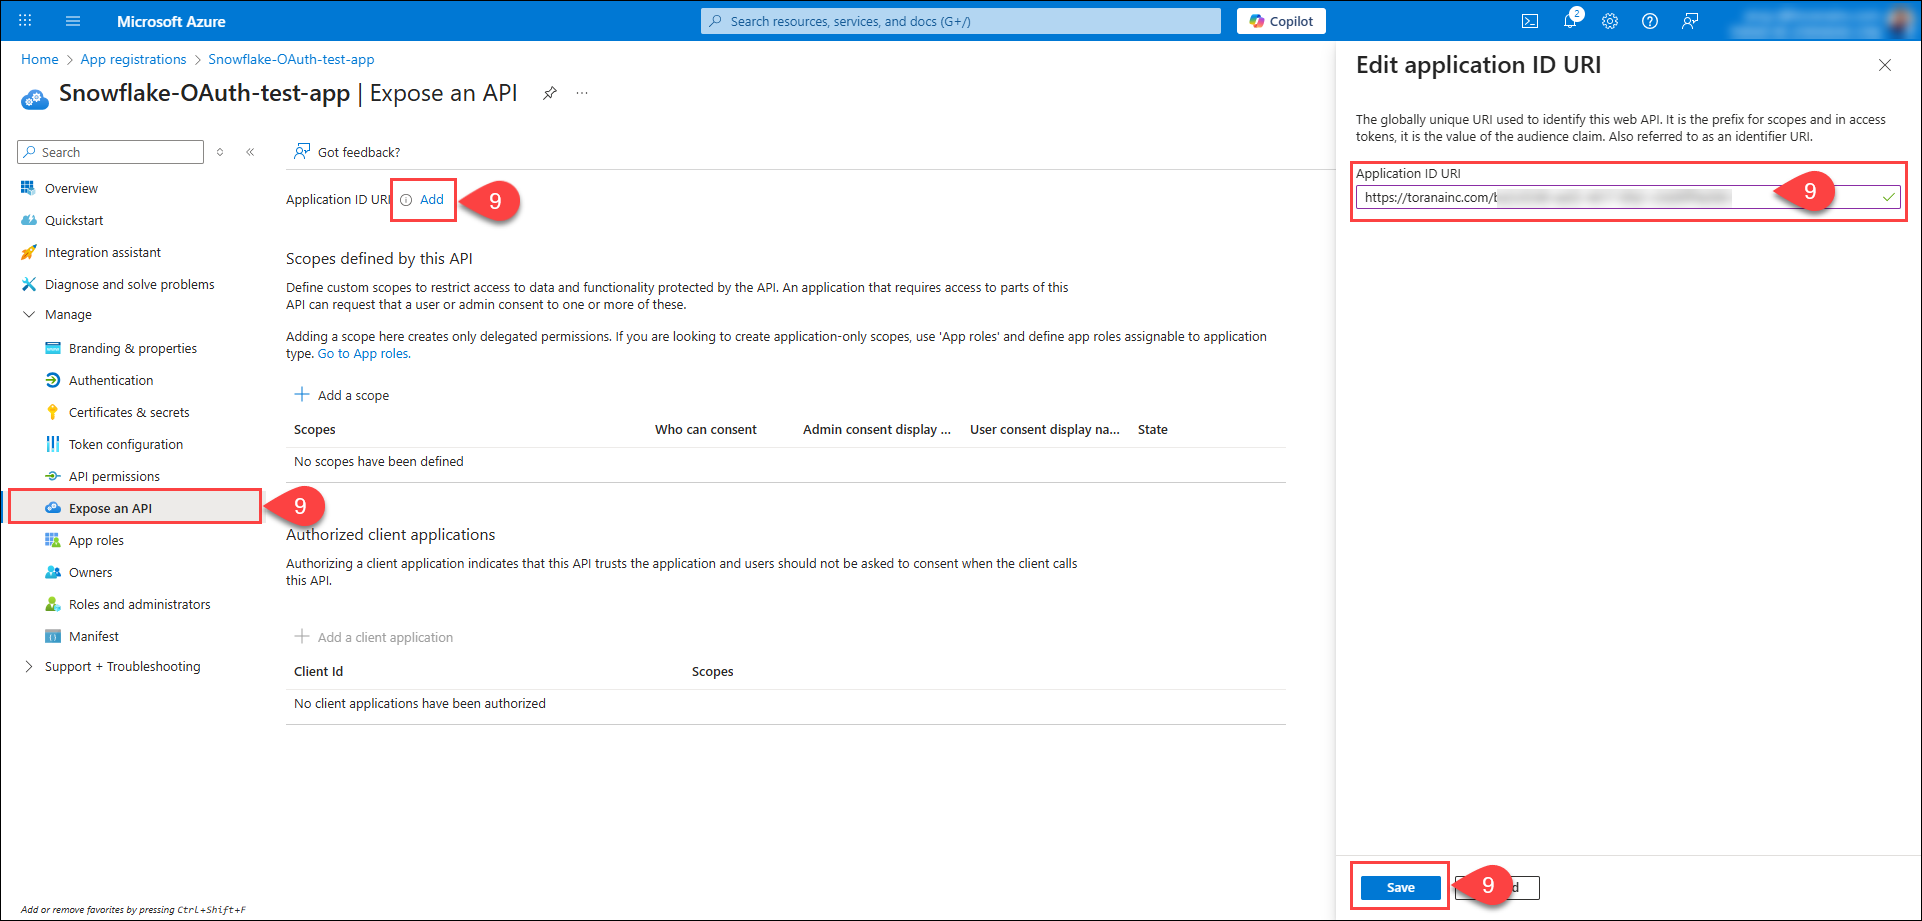
-
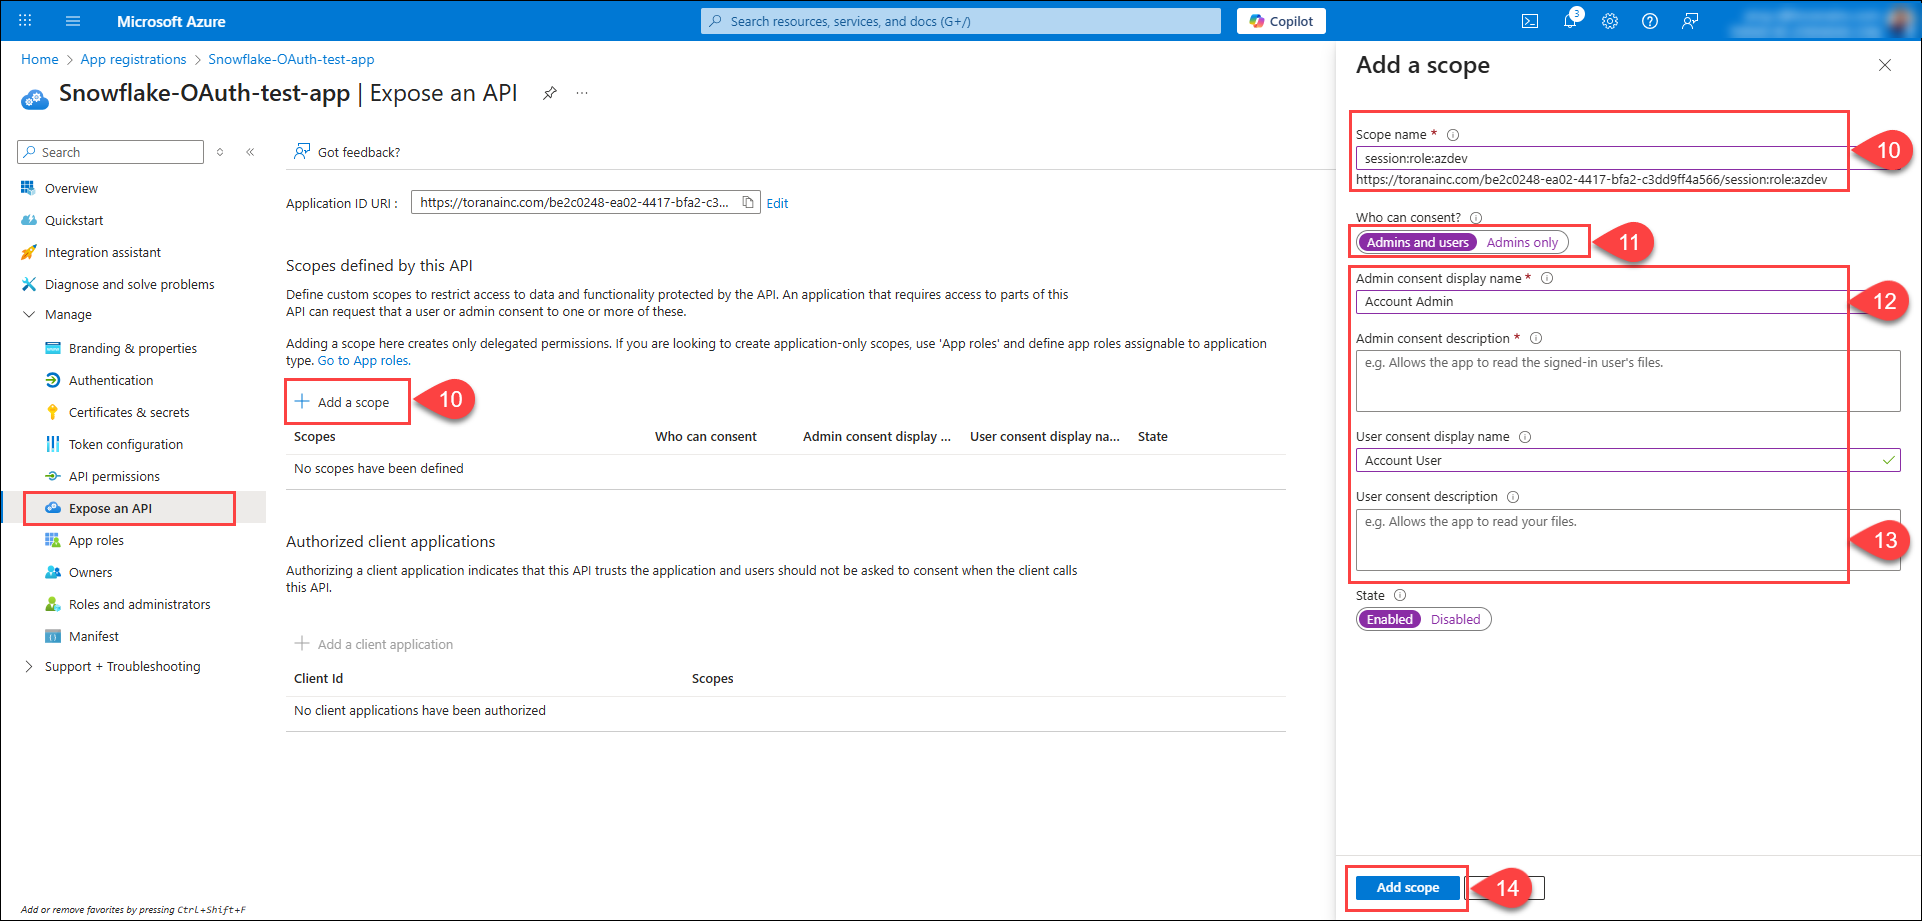
To add a Snowflake role as an OAuth scope, click Add a scope and select the scope that represents the Snowflake role with the
session:roleprefix. For iceDQ connection, entersession:role-any. -
Select whether only Admins or both Admins and Users can consent. Select Admin & User.
-
Enter Admin and User consent display names.
-
Enter Admin and User consent descriptions (Adding user consent description is optional).
-
Click Add Scope.
-
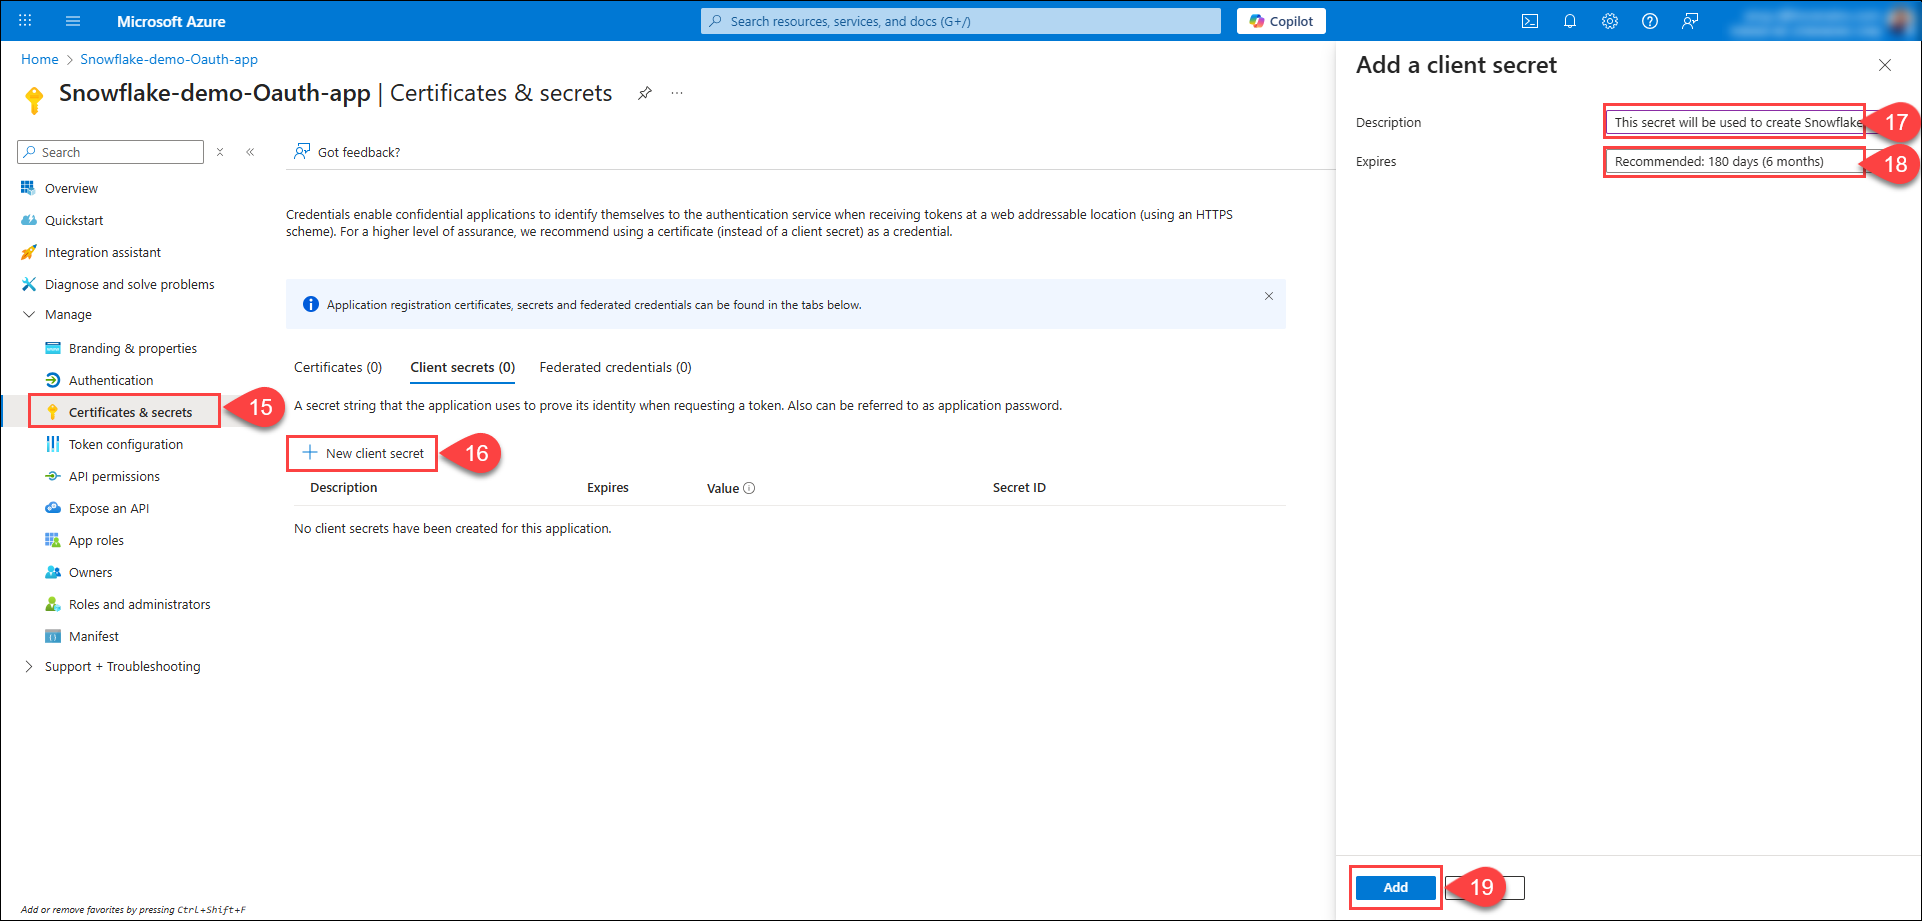
Click on Certificates and Secrets.
-
Click on New Client Secret.
-
Enter a description for the secret.
-
Select an appropriate expiry period of the secret.
-
Click on Add.
-
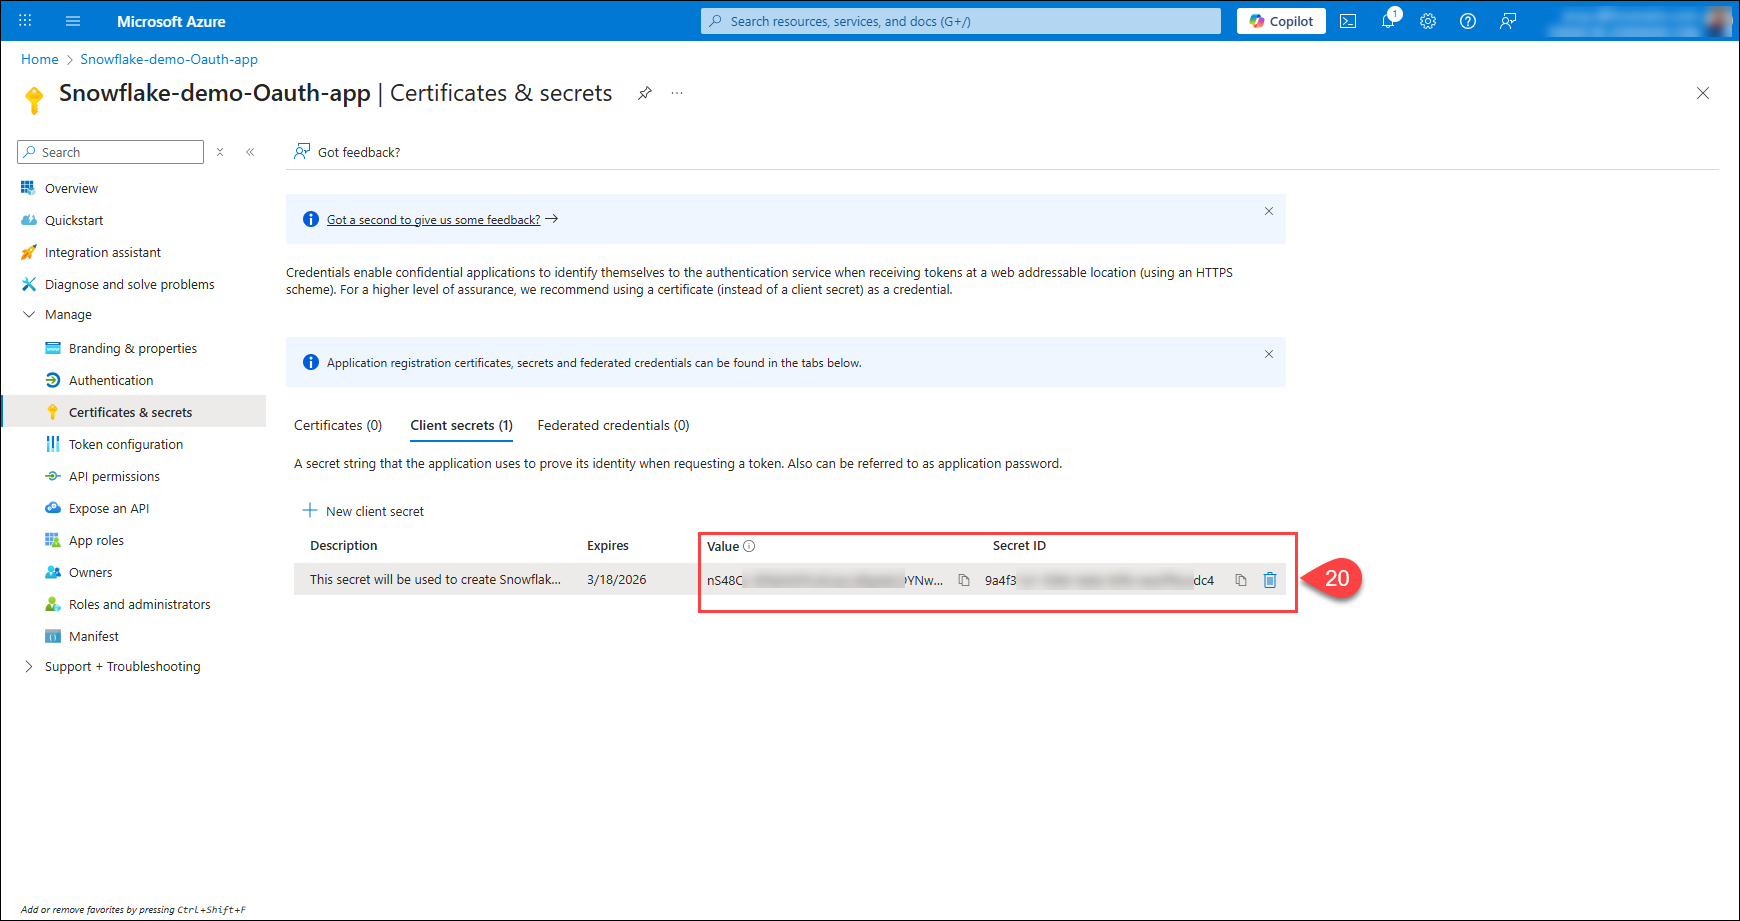
Copy the Value of the newly created secret. It is displayed only once - when the secret is first created.
-
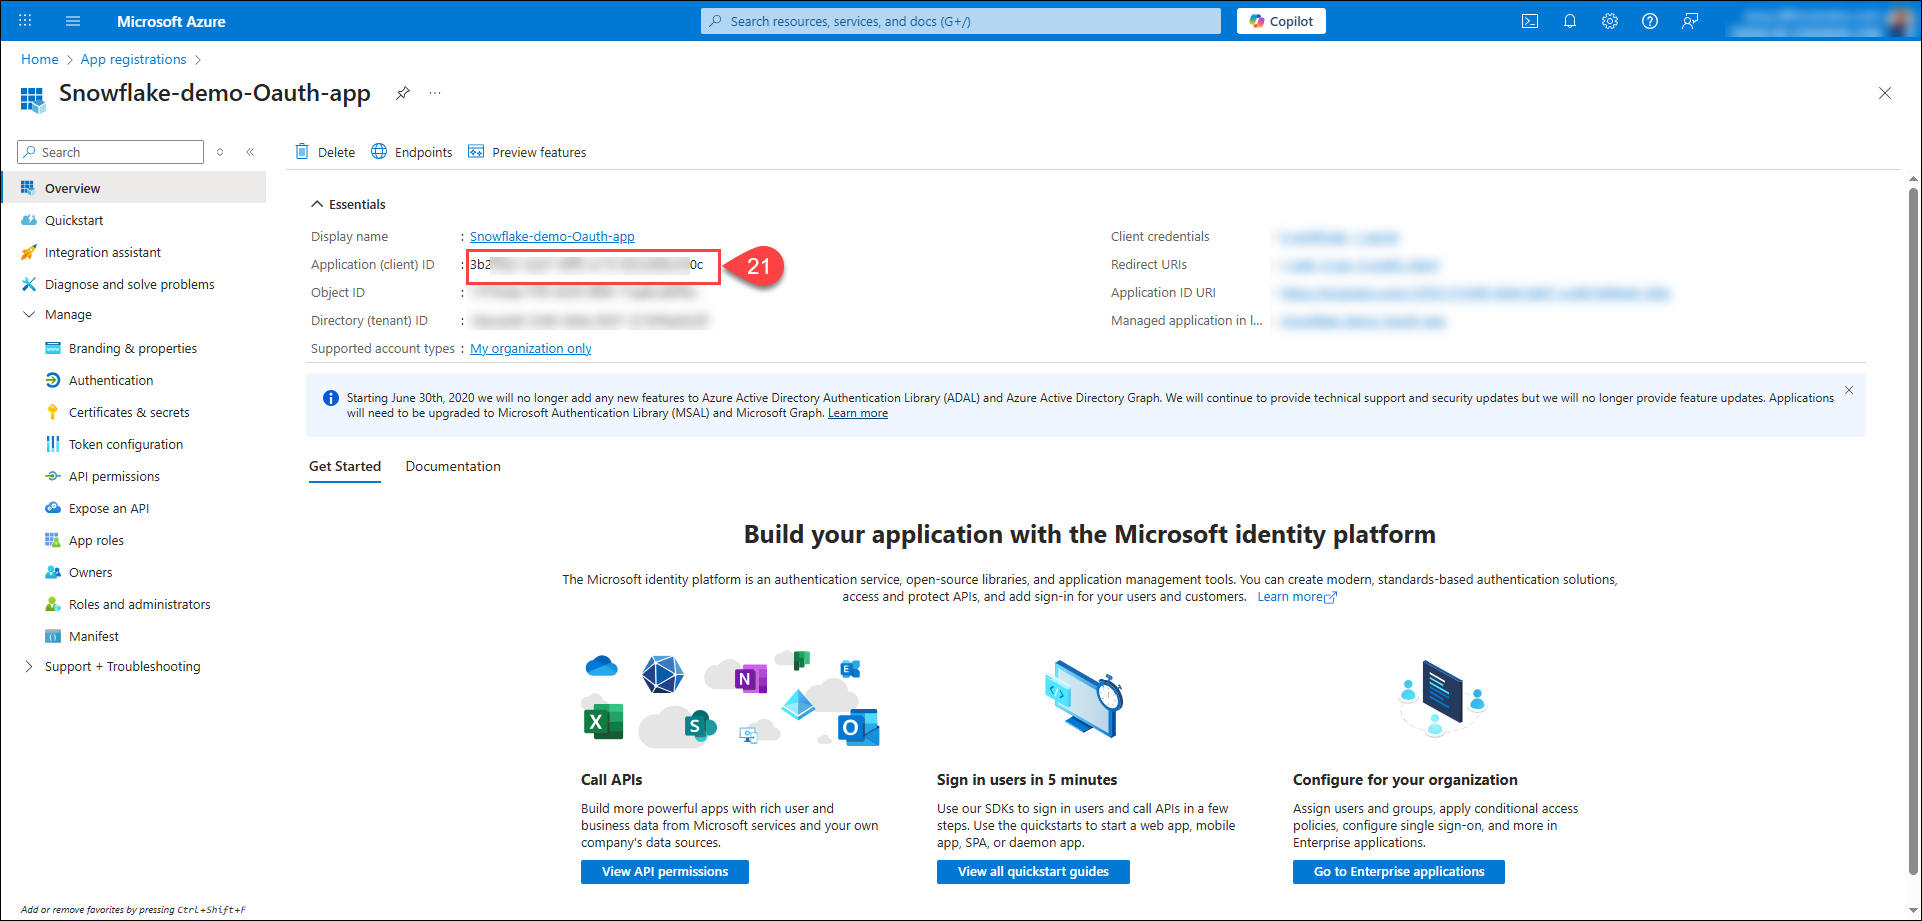
Navigate to the Overview tab, and copy the value of Application (client) ID.
-
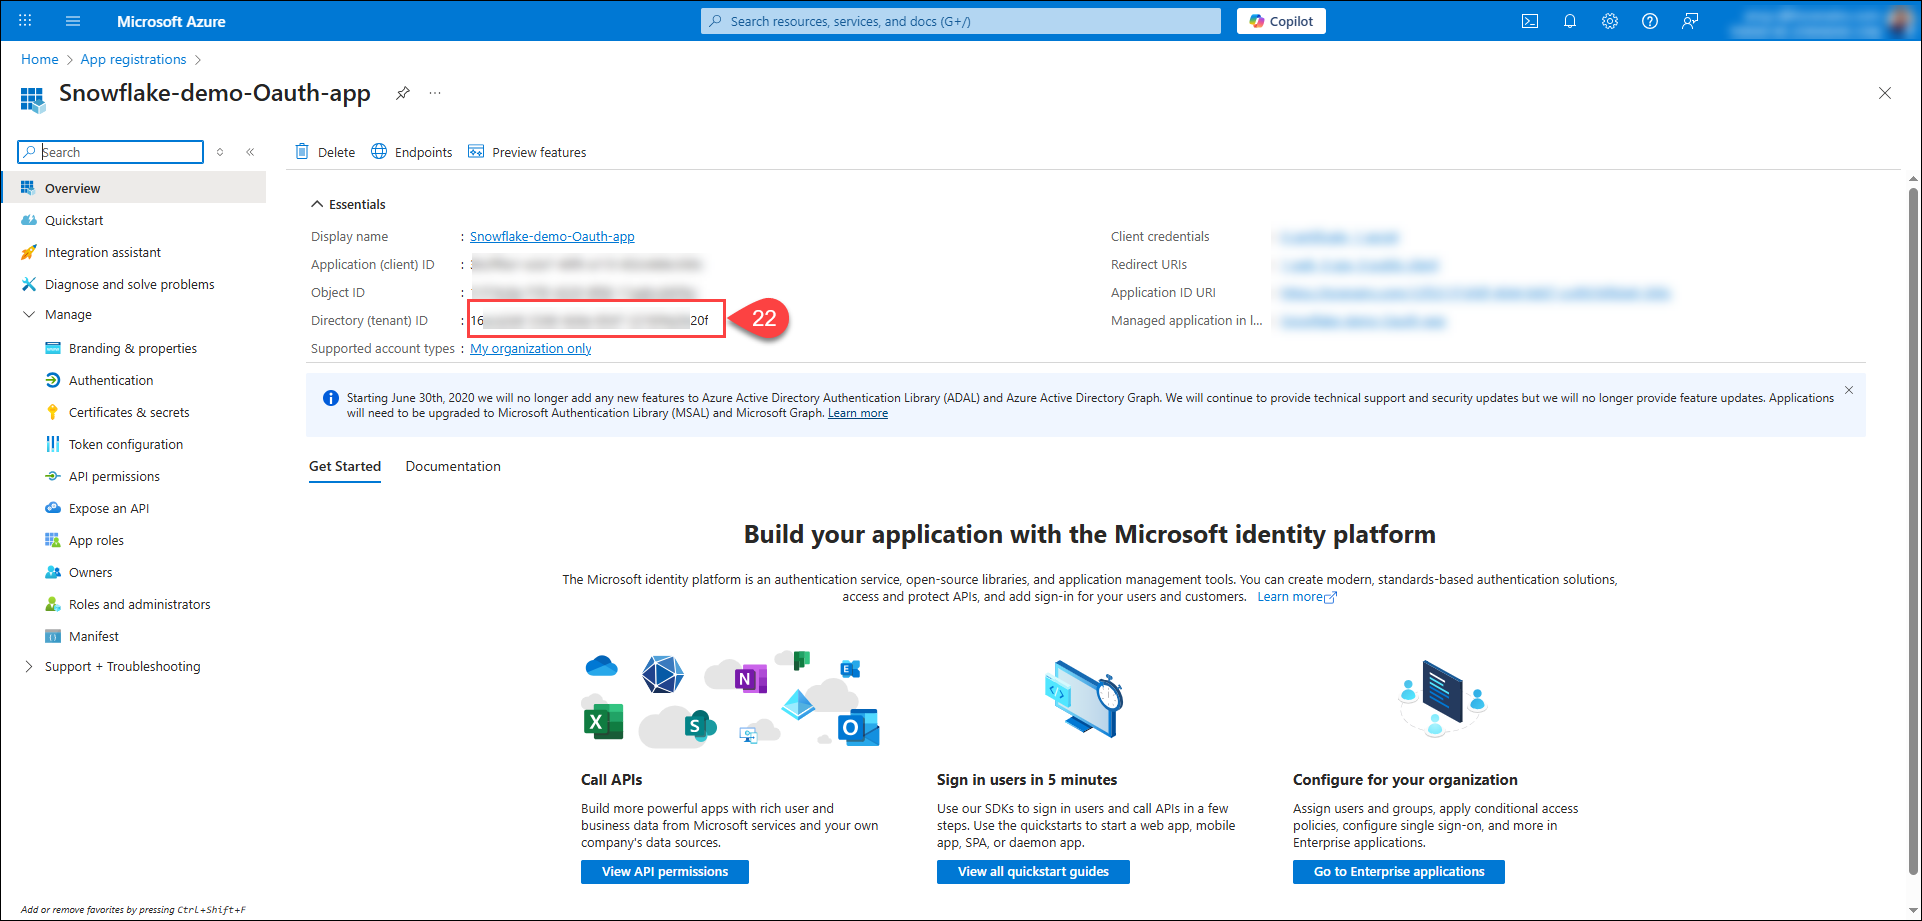
From the Overview tab, copy the value of Directory (tenant) ID.
Part 3: Snowflake Security Integration
In Snowflake, create an OAuth security integration, by executing the below query. Replace the placeholder values of redirect_uri, client_secret, client_id and tenant_id with the actual values obtained from the steps 2.6, 2.20, 2.21 and 2.22 respectively:
CREATE SECURITY INTEGRATION azure_oauth
   TYPE = OAUTH
   ENABLED = TRUE
   OAUTH_CLIENT = CUSTOM
   OAUTH_CLIENT_TYPE = AZURE
   OAUTH_REDIRECT_URI = '<redirect_uri>'         -- e.g., https://app.icedq.net/api/v1/oauth/callback
   OAUTH_CLIENT_ID = '<client_id>'               -- Application (client) ID from Azure App Registration
   OAUTH_CLIENT_SECRET = '<client_secret>'       -- Value of the client secret from Azure
   OAUTH_ISSUER = 'https://login.microsoftonline.com/<tenant_id>/v2.0';  -- Directory (tenant) ID
Part 4: Snowflake External OAuth Connection iceDQ Setup
To create a connection in iceDQ using External OAuth authentication with Entra ID, follow the steps outlined here.
Considerations
- Supported OAuth flow: Only Authorization Code Flow is supported; Client Credentials or Implicit flow are not supported.
- Application ID URI: Must be a verified domain in the organization’s Azure tenant. It is primarily required if custom scopes are defined for mapping Entra ID groups or roles to Snowflake roles.
- Redirect URIs: The Redirect URI configured in Azure App Registration must exactly match the Redirect URI used in the Snowflake connection (in iceDQ). Mismatched URIs will cause login failures.
- Token validation: Snowflake verifies that the login token is intended for this specific integration and is authentic, ensuring that only tokens issued by the registered Entra ID application can be used for authentication.
- Role mapping: Entra ID groups can be mapped to Snowflake roles for fine-grained access control using scopes that are used in the
OAuth Configconnection property in iceDQ.