Online Installation
This topic explains how to install iceDQ in an online environment.
Before you start
Please ensure that all prerequisites have been met before starting the installation and the servers can access to the internet. See the Embedded Cluster Install Requirements.
Preparation
Please log on to your linux machine or VM on which you would like to install the application and follow below steps.
Install Required Packages
Install below packages based on your OS distribution.
For APT based distribution
sudo apt install nfs-common -y
For YUM based distribution
sudo yum install nfs-utils –y
Create Installation Directory
- Create an installation directory on the VM
- Change to the newly created directory before downloading the installer
mkdir icedq-installation
cd icedq-installation/
Installation
Please reach out your sales or customer success contact to get access to your download portal. You can get the auth code from your download portal, it is different for every customer.
Below is the screenshot of what the download portal looks like.
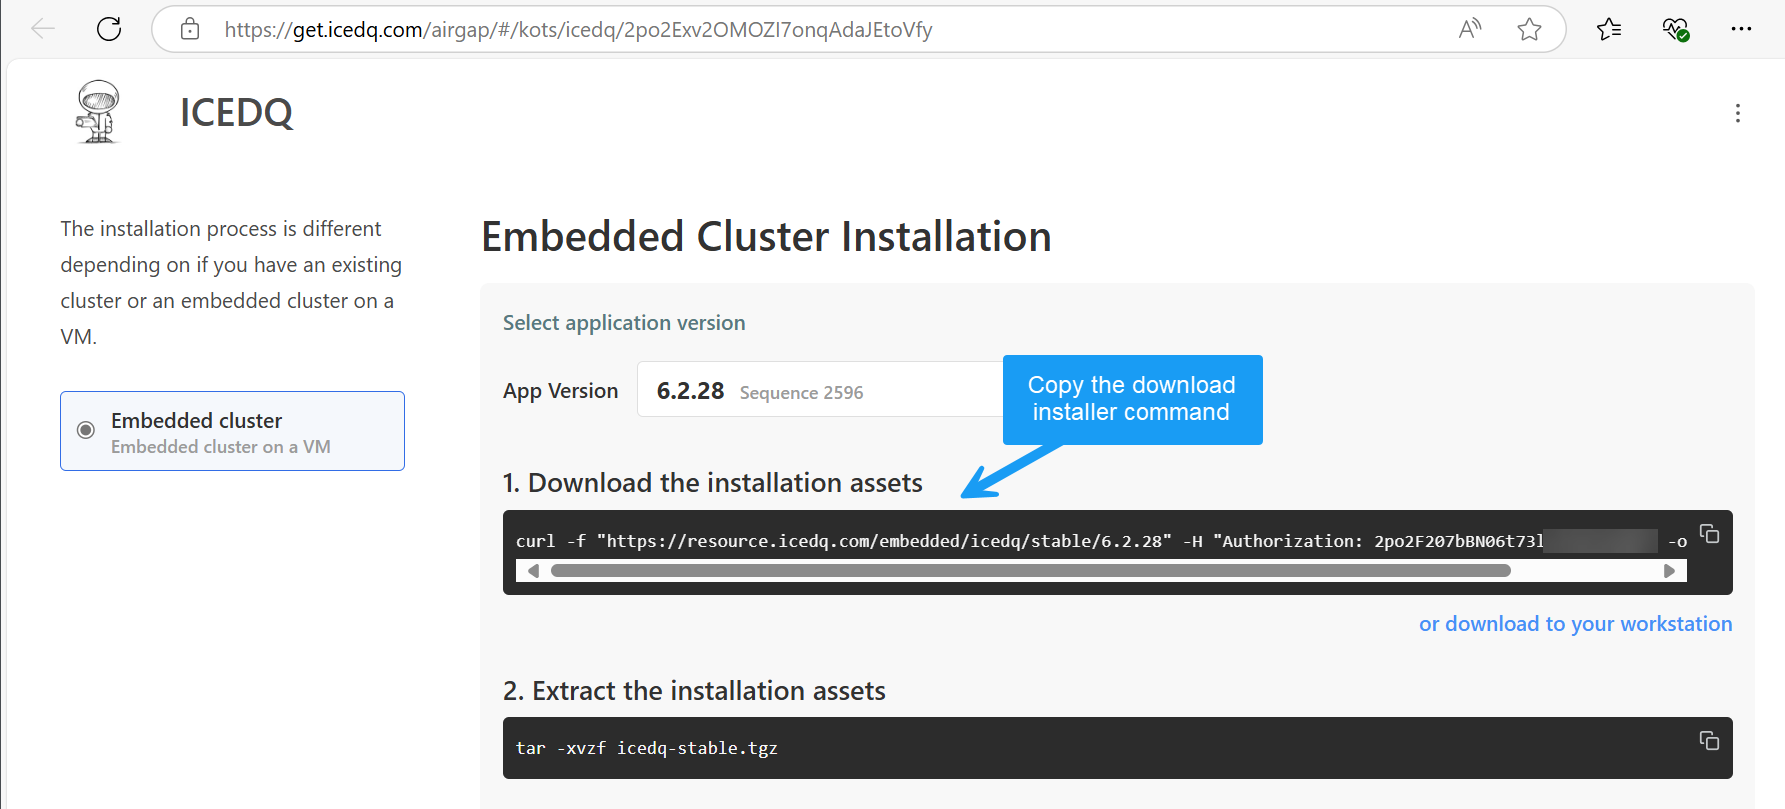
Download Installer
- Log into Download Portal
- Copy
Download the installation assetscommand - Copy
Extract the installation assetscommand
It should look something like below.
curl -f "https://resource.icedq.com/embedded/icedq/stable" -H "Authorization: <auth code>" -o icedq-stable.tgz
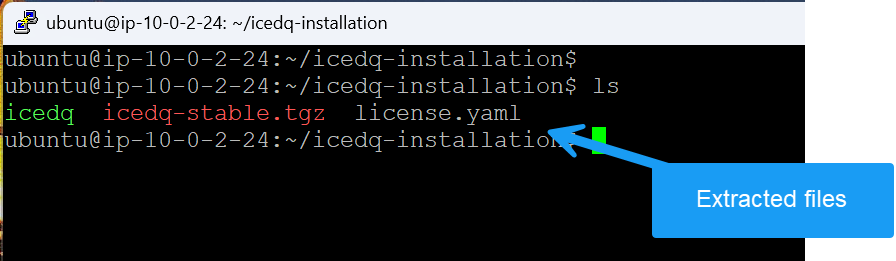
tar -xvzf icedq-stable.tgz
Note: The extraction will create an
icedqfolder andlicense.yamlfile in the installation directory.
Run Installer
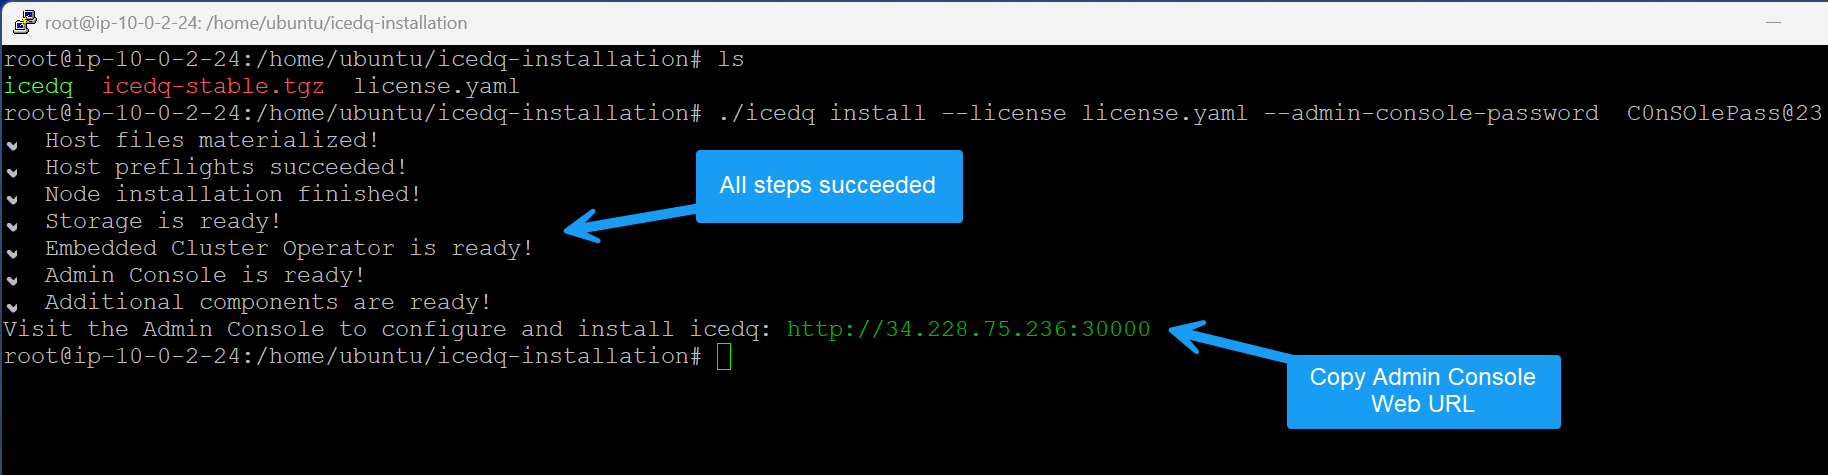
After the extraction, run the following commands in the installation directory to start the process. Replace <desired-password> and note it as it would be required for console login.
sudo ./icedq install --license license.yaml --admin-console-password <desired-password>
Upon successful installation of the admin console you will see an Admin Console Web URL. Please copy it for the next steps. For reference see the screenshot below.
Secure the Installer (Admin Console)
In this step, you can either provide your own TLS certificates to enable SSL for the admin console application or use the self-signed certificates we provide.
- Open the
Admin Console Web URLin a browser - Click on
Start - Click on
Continue - Click on
Advance - Click on
Continue to ... - Choose if you would like to use
Self SignedorUpload your owncertificate - Click
Continue

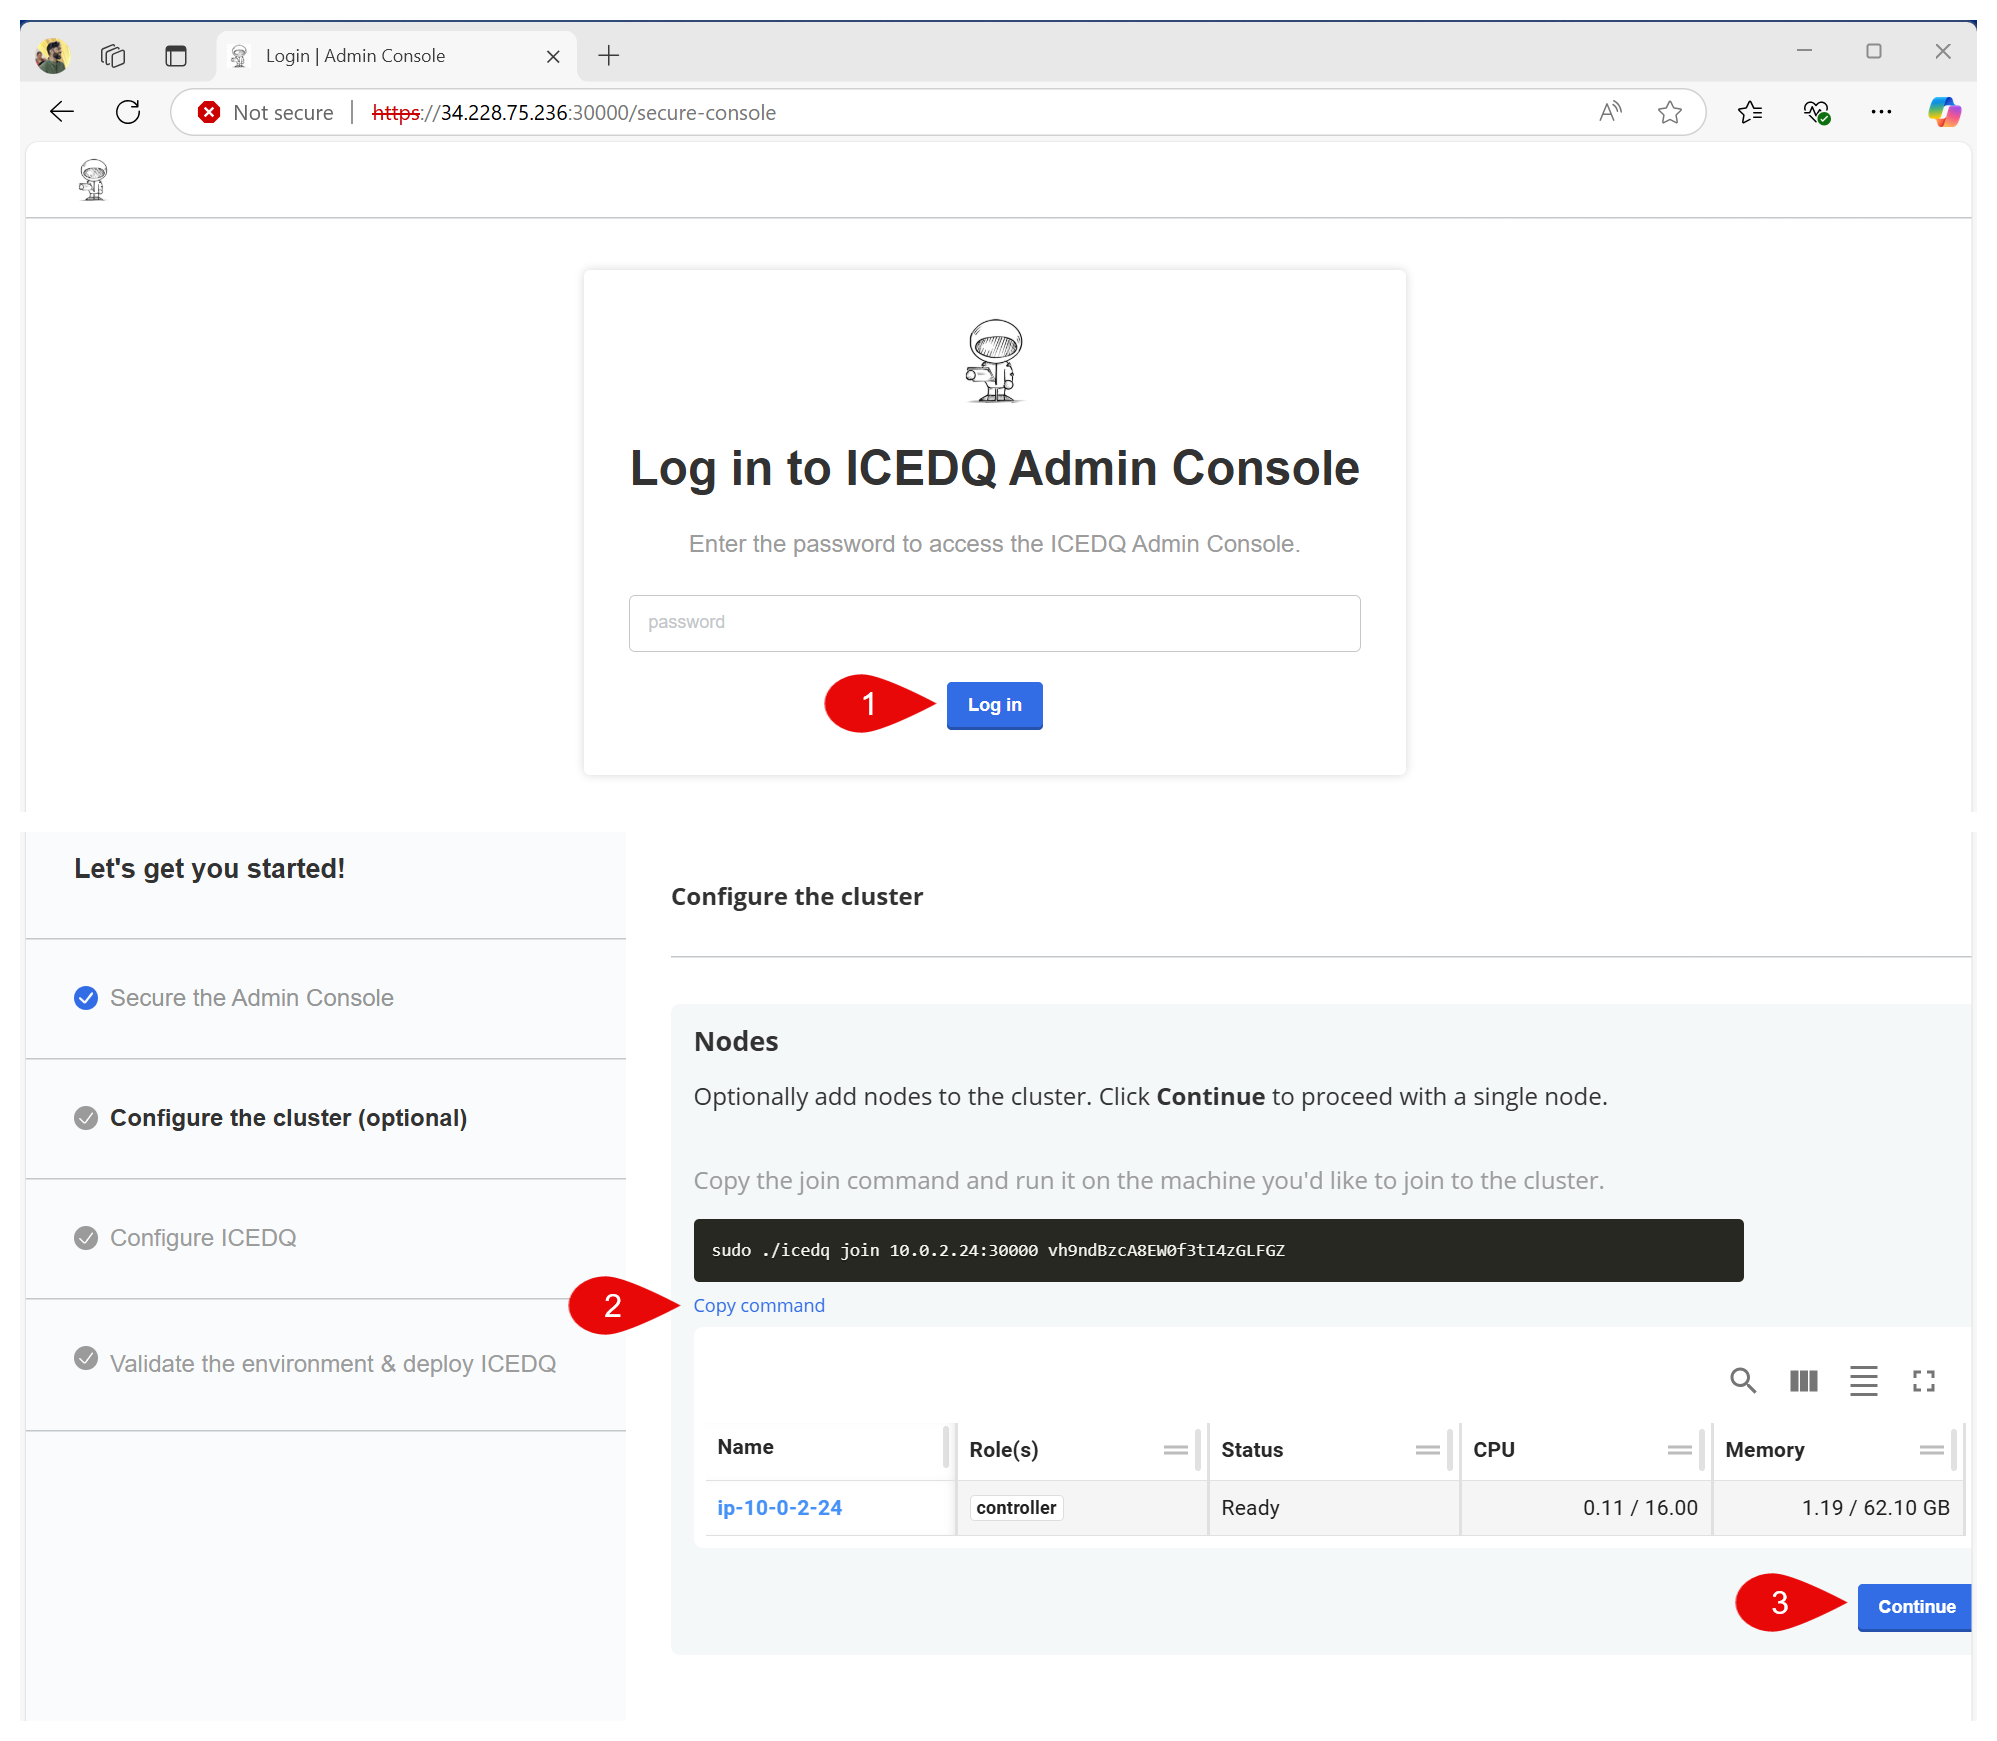
Cluster Configuration
- Input the admin console password & Click
Login - Optional: Click Copy Command to save it for future use if you plan to perform a multi-node cluster installation. You may skip this step if you're setting up a single-node installation.
- Click
Continue
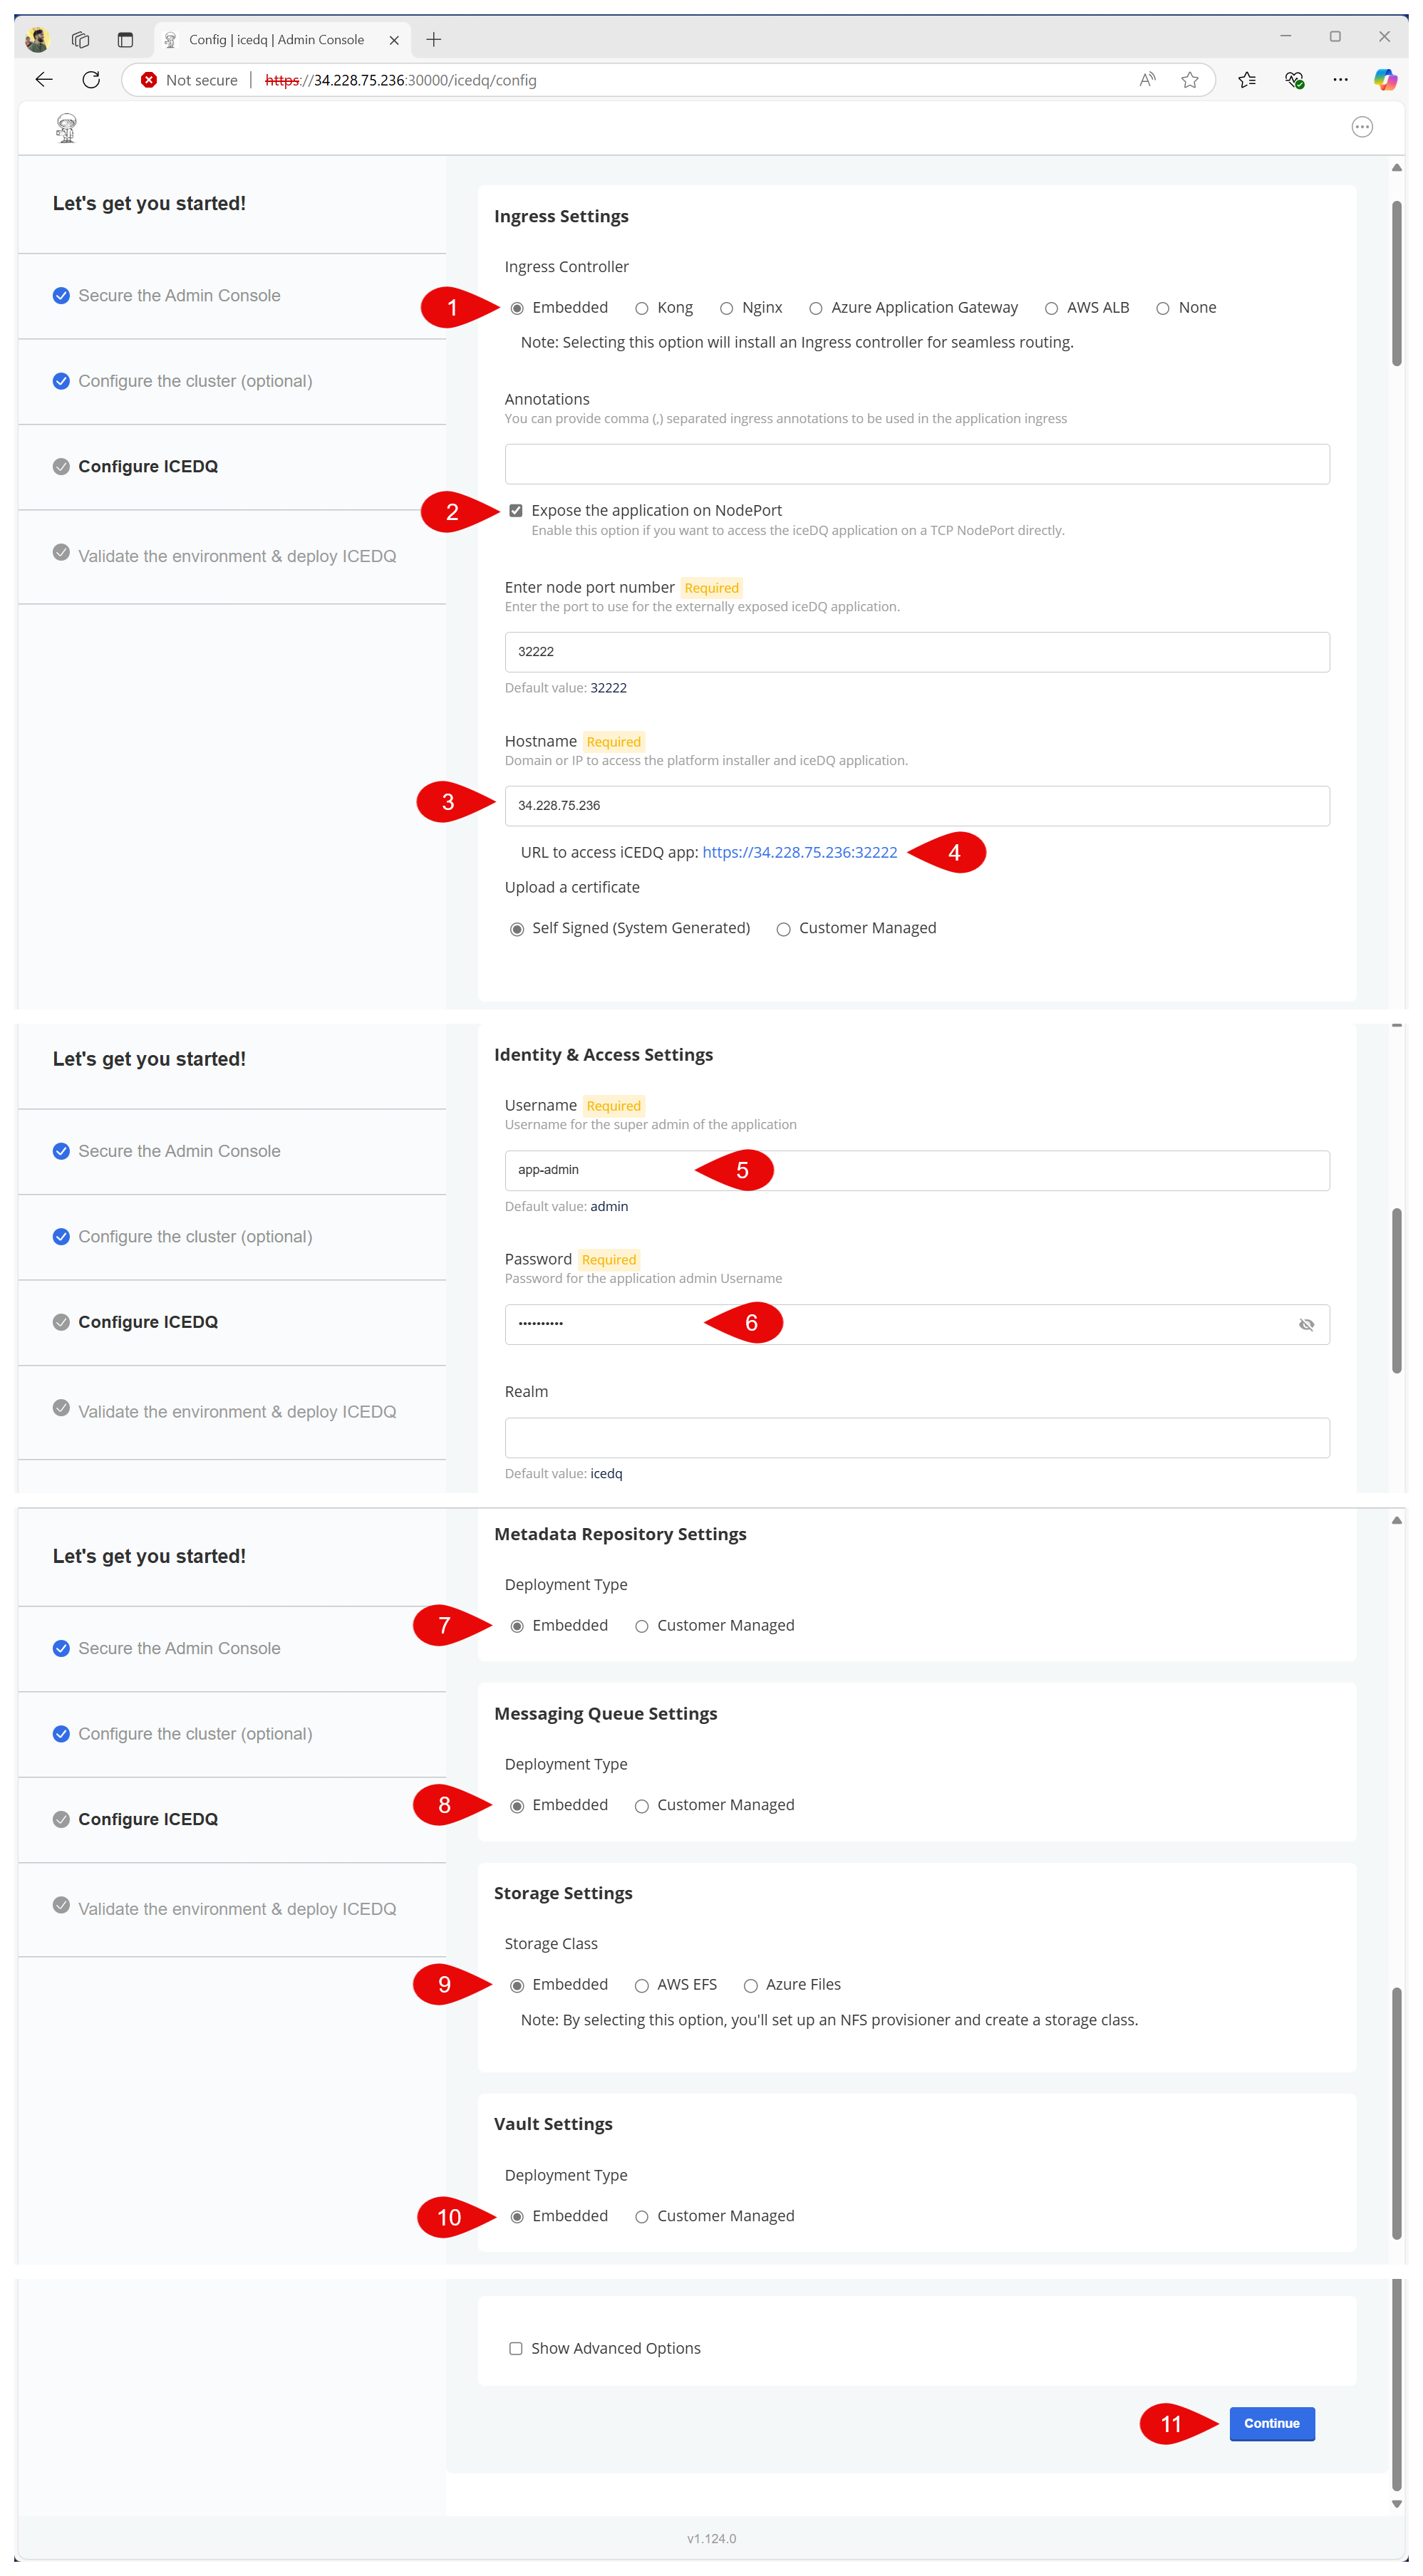
Application Configuration (iceDQ)
- Choose Ingress Controller as
Embedded - Enable
Expose the application to NodePortCheckbox (Keep the default value32222) - Input
Hostname(This can be the IP address of the node or DNS) - Copy the
iceDQ application URL - Input
Usernamefor the super admin of the application - Input
Passwordfor the super admin of the application - Choose
Deployment TypeasEmbeddedforMetadata Repository - Choose
Deployment TypeasEmbeddedforMessaging Queue - Choose
Deployment TypeasEmbeddedforStorage - Choose
Deployment TypeasEmbeddedforVault - Click
Continue
Deploy Application
- Ensure all preflight checks are a success
- If successful, Click
Deploy - Monitor deployment status of all services/ pods by clicking on
Detail - Once all the services are successfully deployed verify status is
Ready
It may take 10–15 minutes for all services to deploy and for the application status to transition from Unavailable to Ready.

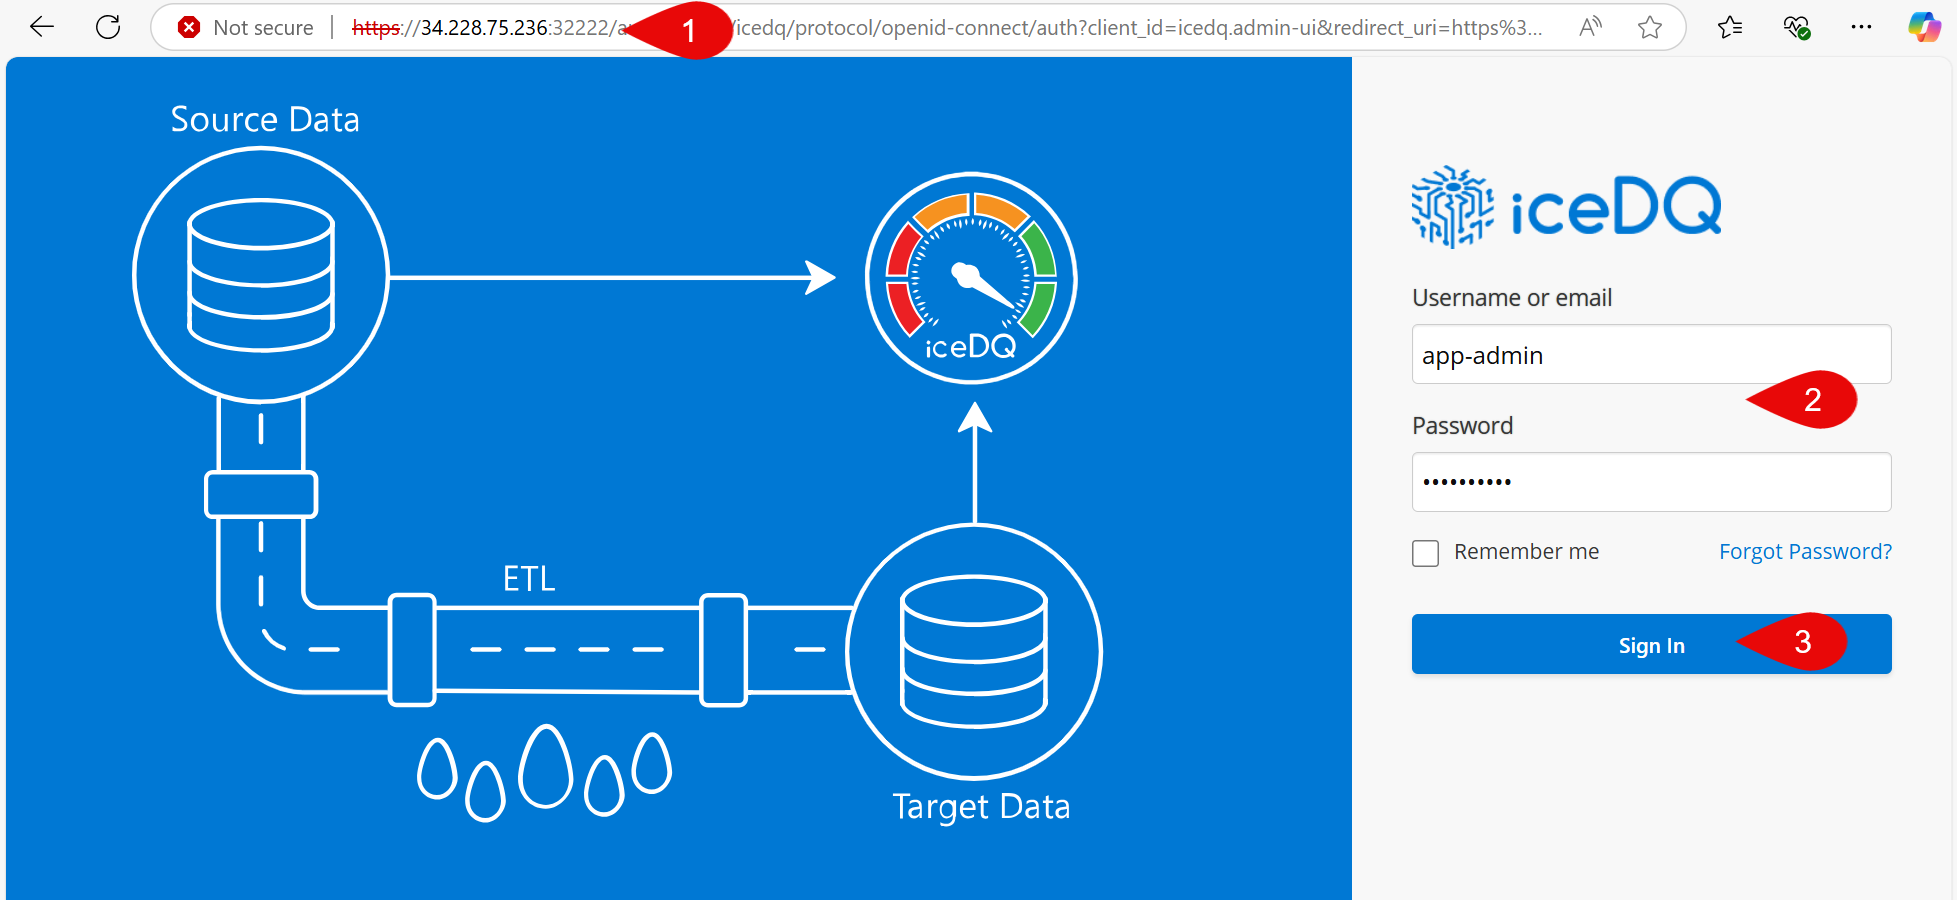
Access the Application
- Open the
Application URLin a browser (Copied inStep 4of Application Configuration) - Input
UsernameandPasswordof the supper admin. - Click
Sign In
Adding Nodes
The above installation supports a single-node setup. If you wish to expand your deployment for load balancing, high availability, scalability, or other purposes, please follow the steps outlined below.
To begin, log in to the Linux machine or virtual machine (VM) that you intend to add as a new node to the cluster, and then proceed with the following instructions.
- Repeat the Install Required Packages step on the node
- Repeat the Create Installation Directory step on the node
- Repeat the Download Installer step on the node
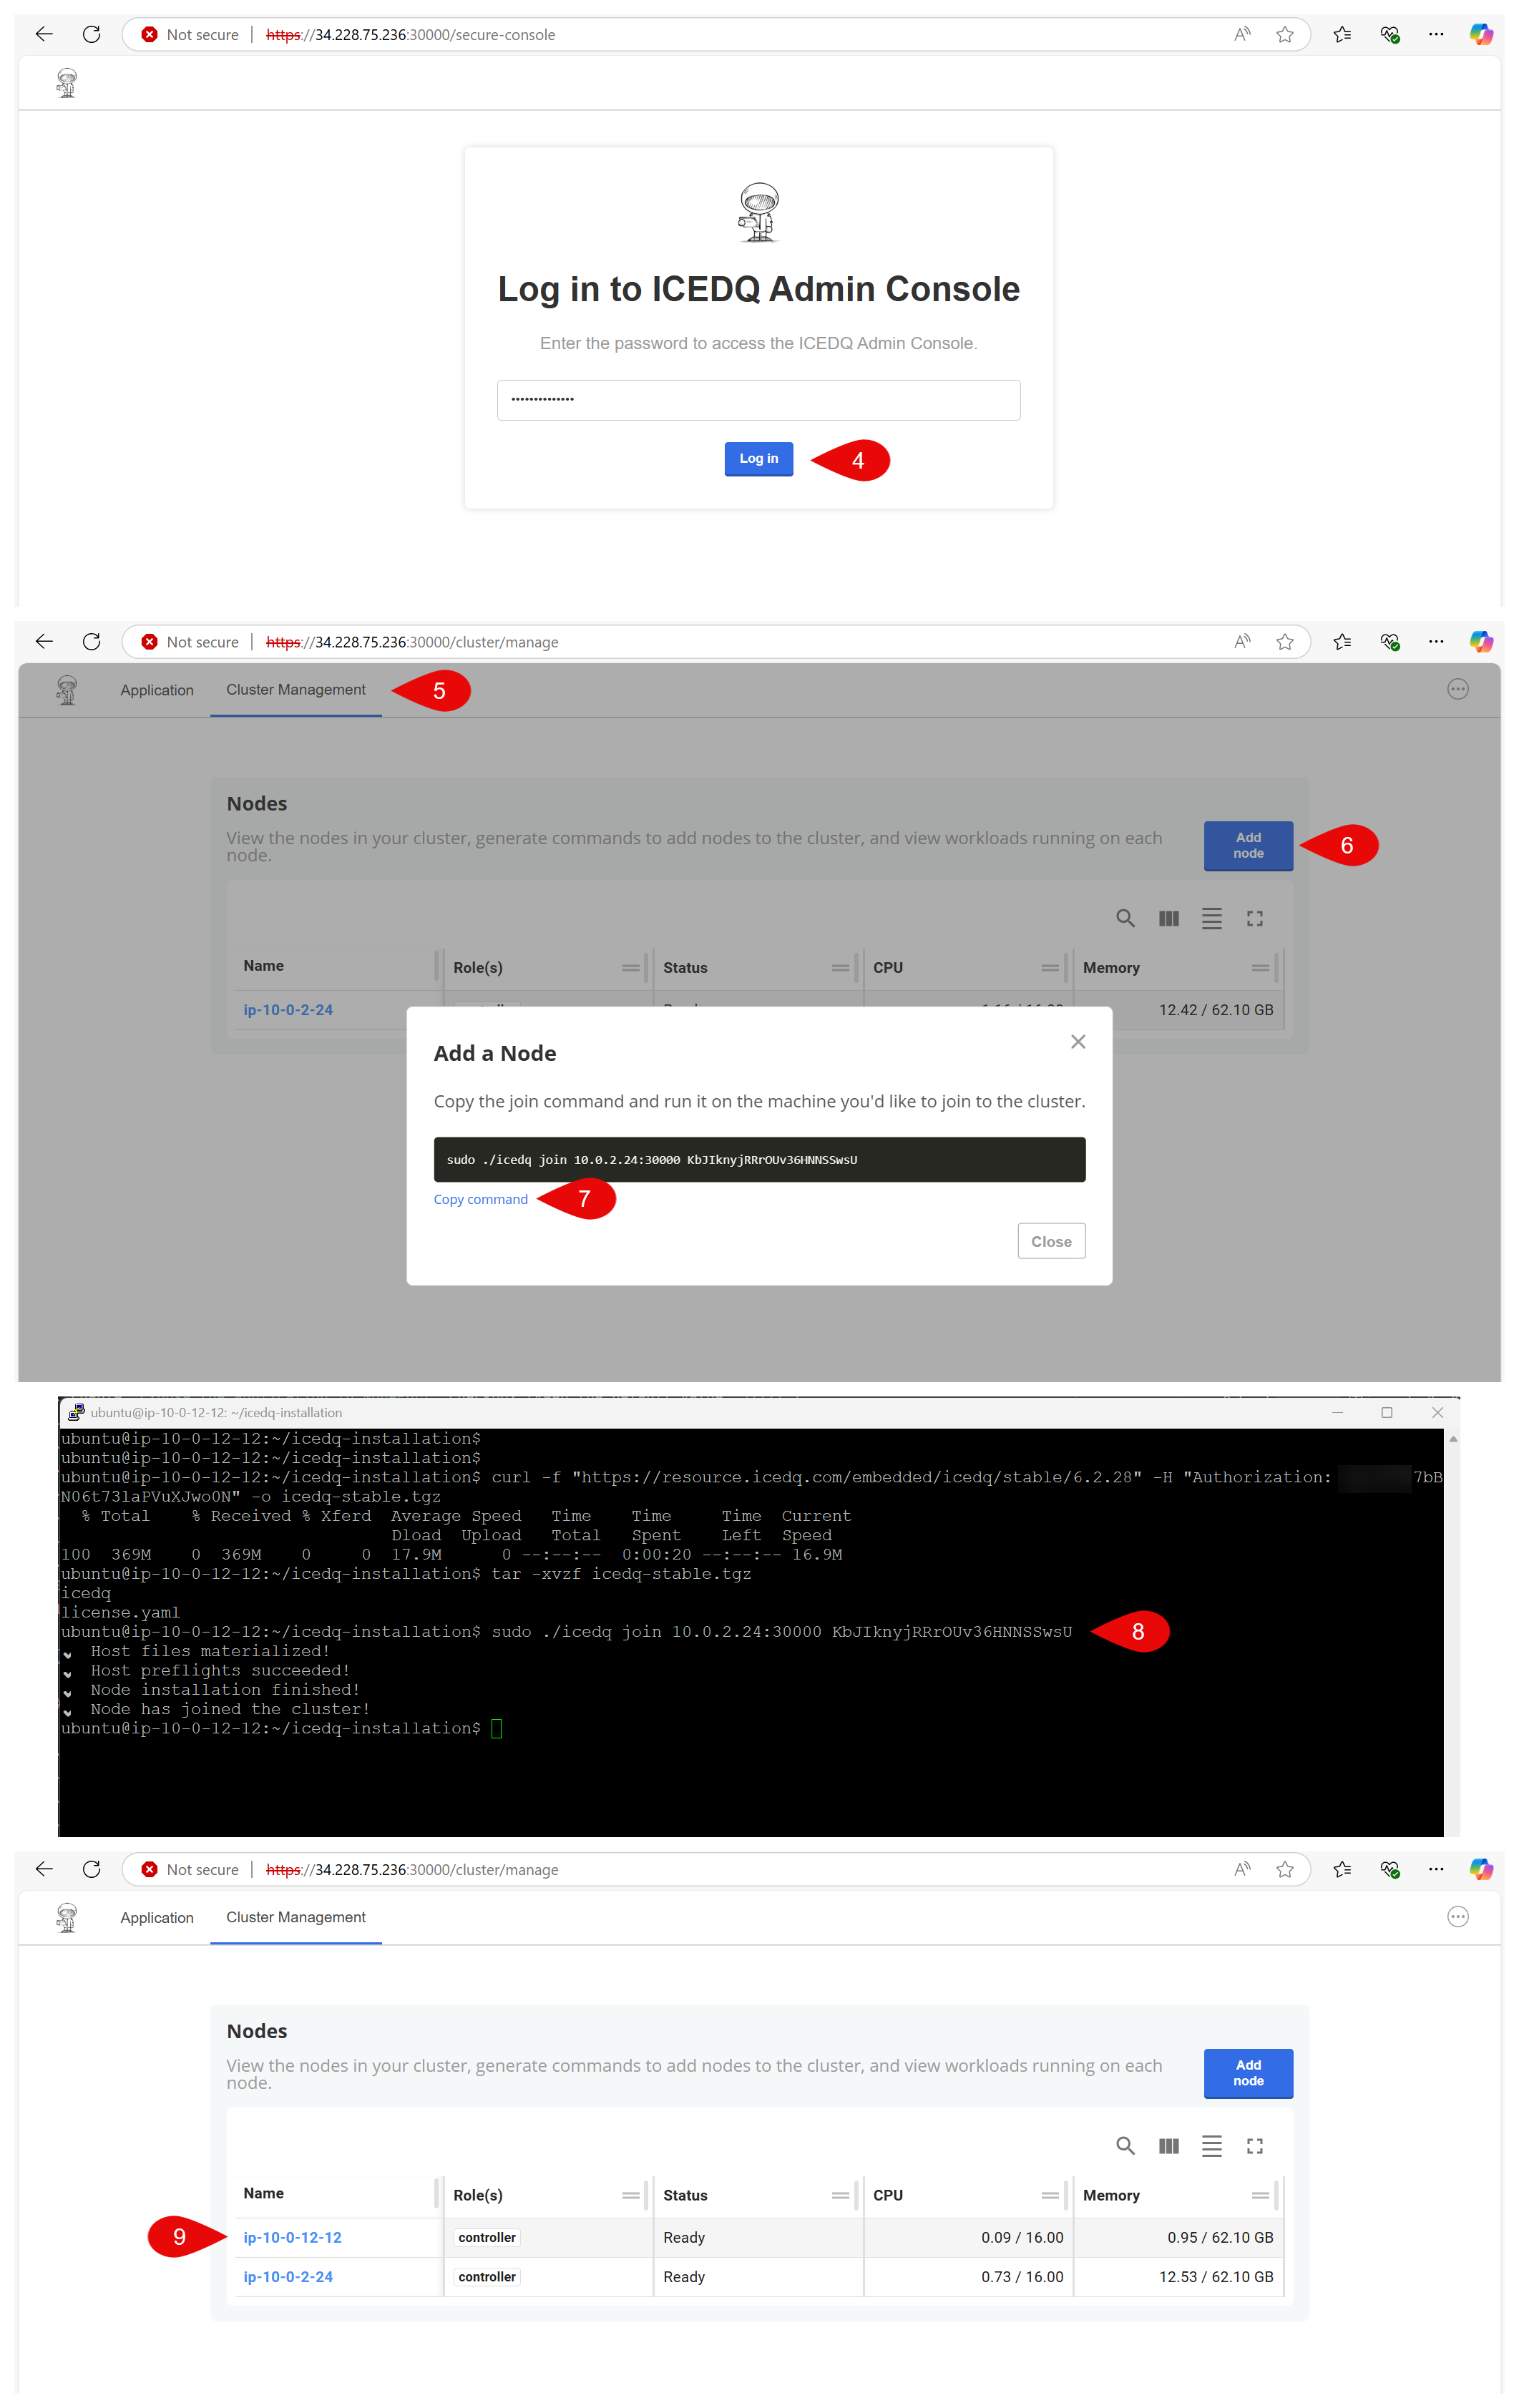
- Log into the
Admin Console - Go to
Cluster Managementtab - Click on
Add node - Click
Copy command - Run the
Join commandon the node - Go to
Cluster Managementtab inAdmin Consoleto verify that node has been added
Pods/ Services will be redistributed across the nodes automatically